Lag-screw principles
1. Introduction
General considerations
In general, a lag screw is a screw designed, or inserted, so that its thread purchases only in the farther of two fragments to be compressed together.
The function of a lag screw can be achieved in one of the following ways:
- Using a fully threaded standard, or cannulated, cortex screw, creating a gliding hole in the near fragment and thereby allowing the thread to purchase only in the far fragment
- Using a standard, or cannulated, partially threaded cancellous screw
- Using one of the two types of headless compression screws. One type, such as the Herbert screw, has a finer pitch at the proximal end than at the distal end. The variable pitch geometry generates a compression force across the fracture plane. The other type of headless screw is not a variable-pitch implant, but relies on the use of a dedicated external compression device after reduction and prior to full screw insertion. For details of this technique, please consult the manufacturer's technical manual.
Indications
Lag screw fixation is indicated in children, mainly for:
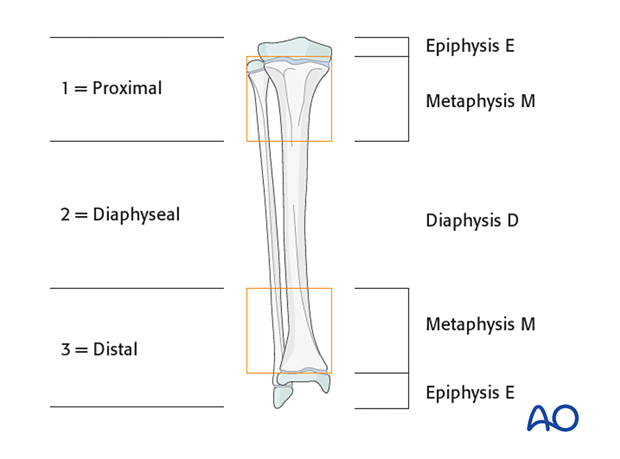
- Fractures in epi-/metaphyseal areas (defined by the AO classification)
- Small fracture fragments
Lag screw fixation is not indicated for:
- Diaphyseal fracture fixation, other than interfragmentary compression in combination with plate fixation
Cannulated screw principles
Cannulated screw size is chosen according to the age of the child and the size of the fragment.
The following points influence the dimensions of the cannulated screw:
- Patient age/size
- Fracture location
- Fragment size
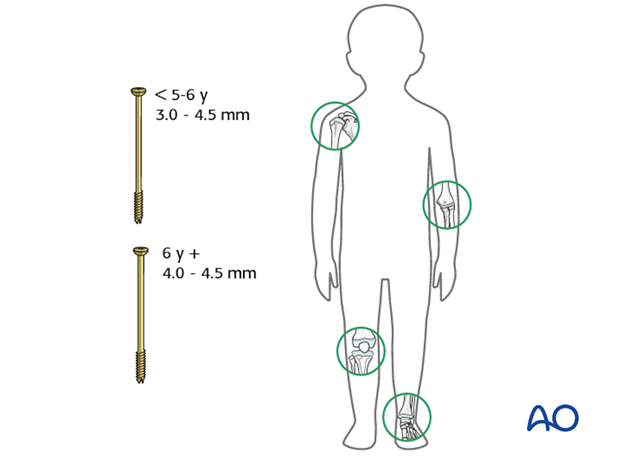
In children younger than 5–6 years, 3.0–4.5 mm cannulated screws are used for fractures around the shoulder, elbow, knee and ankle joints.
In children older than this, 4.0–4.5 mm cannulated screws are usually used, depending on the location of the fracture.
It is also important to take into account the weight of the patient when choosing the screw size in the lower limbs.
Metaphyseal fractures of the long bones require at least 3.0–4.5 mm cannulated screws.
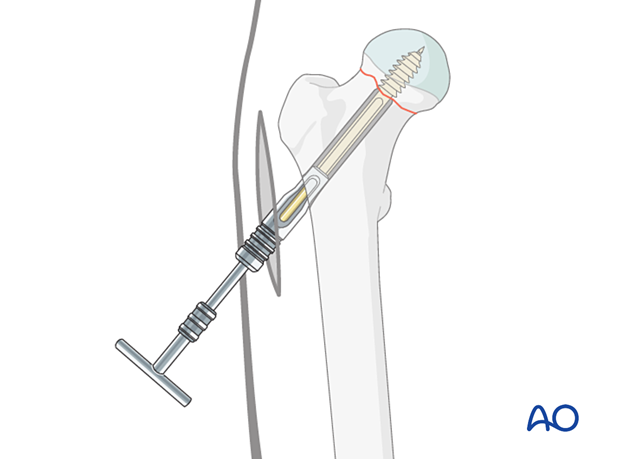
Proximal femoral fractures (femoral neck and slipped capital femoral epiphysis (SCFE)) require 4.5–7.3 mm screws.
The size of the cannulated screw has to correspond to the size of the fragment. For example, a fracture of the medial epicondyle of the humerus requires a cannulated screw of smaller diameter than a fracture of the lateral humeral condyle.
The length of the unthreaded part of the screw is chosen so that it extends through the entire free fragment and just into the main fragment. As a result, the thread of the screw will only engage in the main fragment.
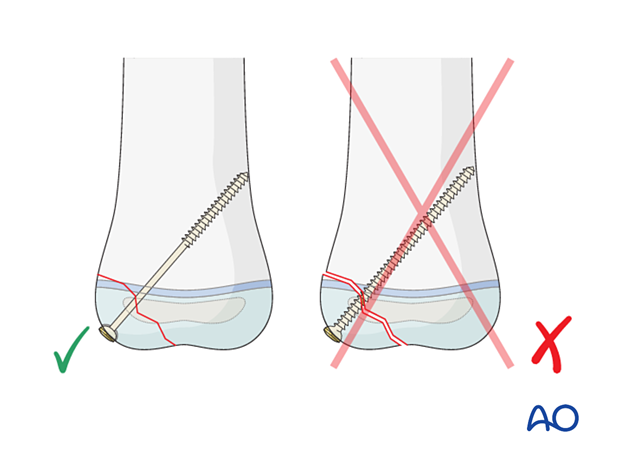
The number of cannulated screws used for a given fragment depends on the fracture morphology and the fragment size.
In most cases, 1–3 cannulated screws give sufficient stabilization if the screws are:
- Of the correct size: 3.0–4.5 mm for the distal humerus, up to 7.3 mm for larger metaphyseal lesions, such as in the femur and the proximal tibia
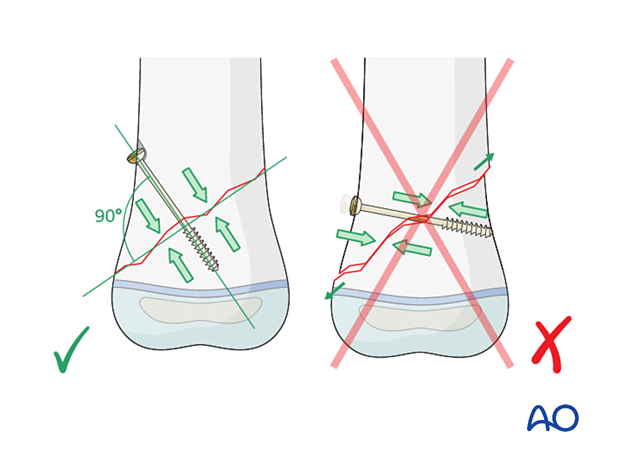
- Inserted perpendicularly to the fracture plane
To fix free fragments to a main fragment, it is recommended to insert the cannulated screw from the fragment into the main one.
2. Direction of screw insertion
Gliding hole
If a fully threaded screw is used as a lag screw, it is necessary to drill a gliding hole in the near fragment to be able to compress the fragments together.
No gliding hole is necessary for partially threaded screws.
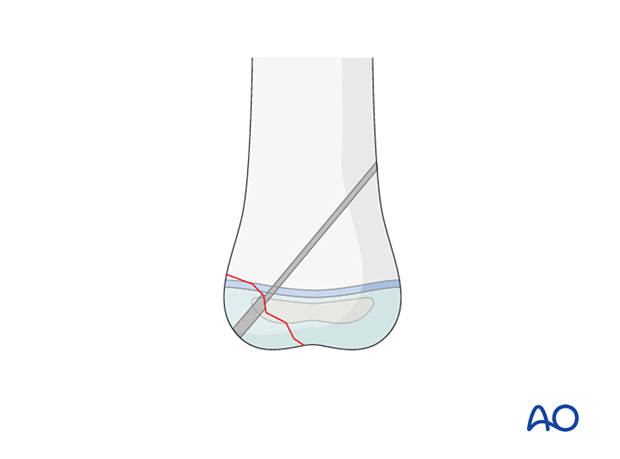
Direction of screw insertion
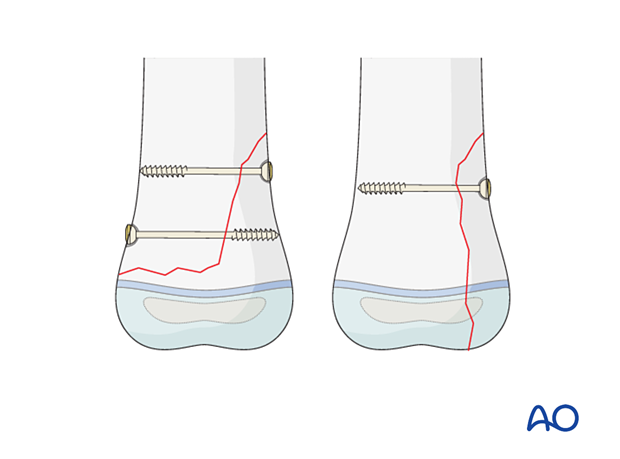
Depending on the indication for the lag principle, there are various ways to insert the screw:
- Interfragmentary fixation from the free fragment into the main fragment
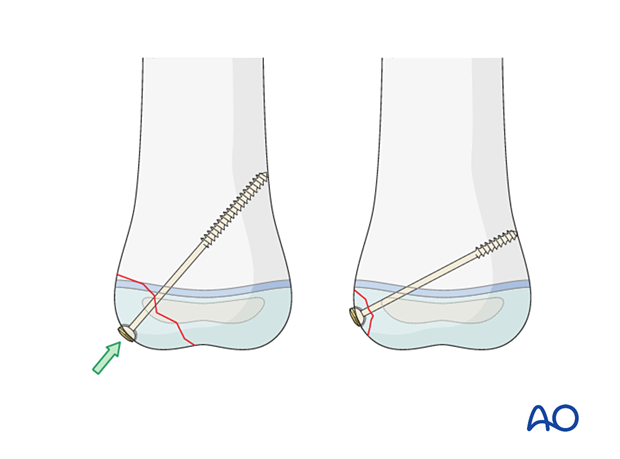
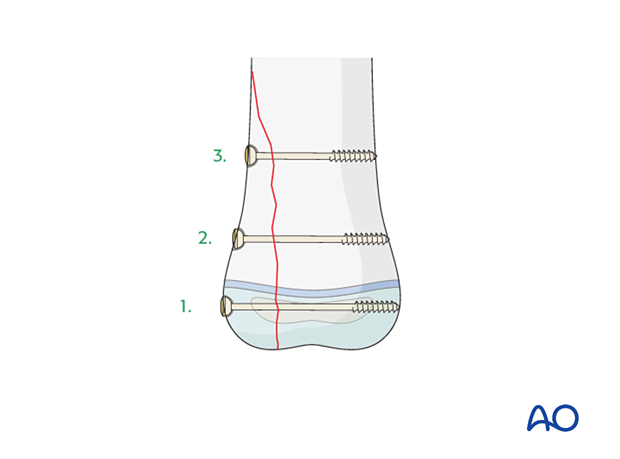
- Fixation of large metaphyseal fragments. Depending on the configuration of the metaphyseal fragment, the fixation is performed from the main fragment to the free fragment, vice versa, or a combination
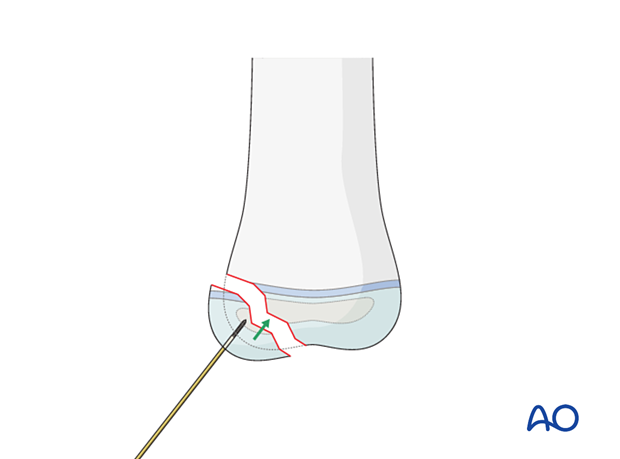
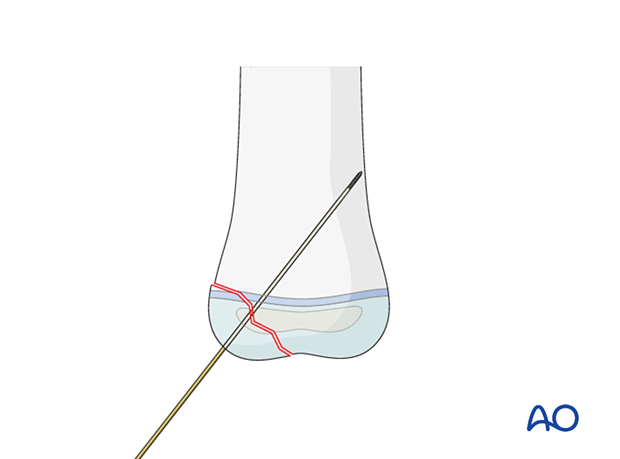
A guide wire is inserted through the free fragment and into the main fragment.
The guide wire can be used initially as a joystick to help to manipulate and reduce the fragment.
Once satisfactory reduction has been obtained, the guide wire is advanced into the main fragment.
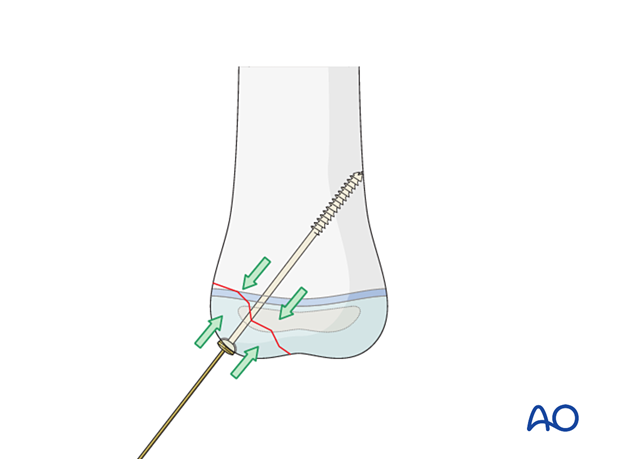
A cannulated partially threaded screw is inserted over the guide wire. The screw will close the fracture gap by exerting interfragmentary compression.
3. Planning
Entry point of a cannulated lag screw
The entry point of the guide wire should be chosen in the thickest part of the fragment. This contributes to maximal stability and prevents splitting of small fragments.
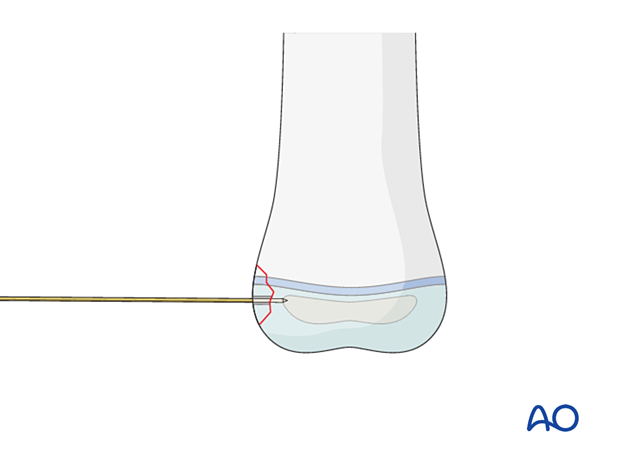
The choice of the entry point must correlate with the planned direction of the cannulated screw and the end fixation point in the main fragment.
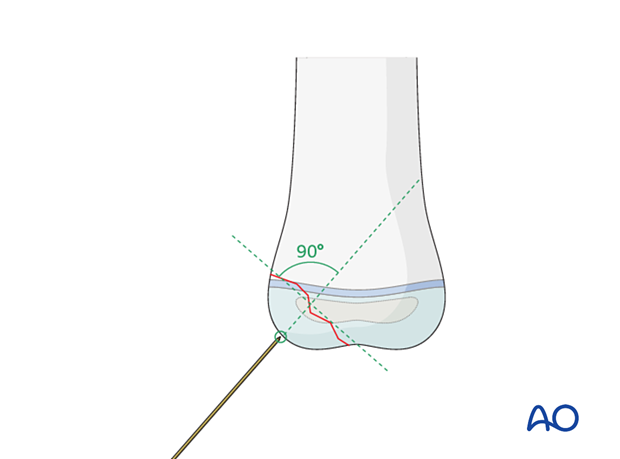
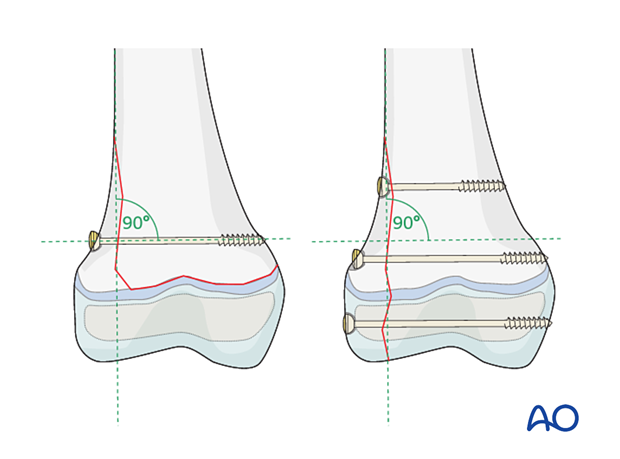
The entry point should also be chosen so as to allow as orthogonal a wire trajectory as possible in relation to the fracture line.
There should also be consideration of the need or otherwise of remaining intra-epiphyseal. The final wire direction may be a compromise between being perpendicular to the fracture line and not crossing the physis.
Direction of cannulated lag screw
To achieve optimal bony compression across the fracture site, the screws are directed perpendicularly to the fracture plane wherever possible.
The tips of the screw should just penetrate the far cortex in the main fragment to guarantee optimal fixation of the fragment.
4. Screw insertion
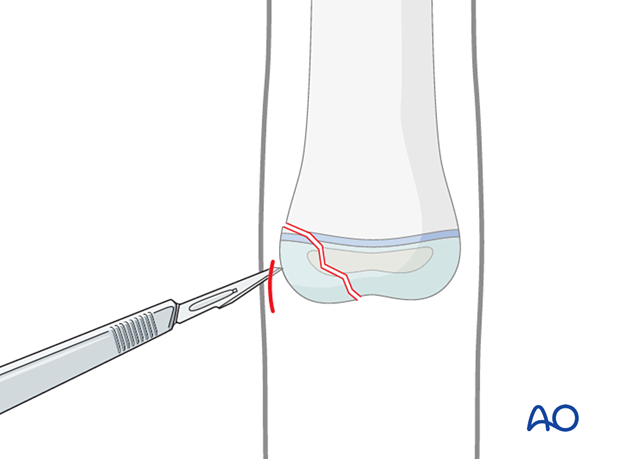
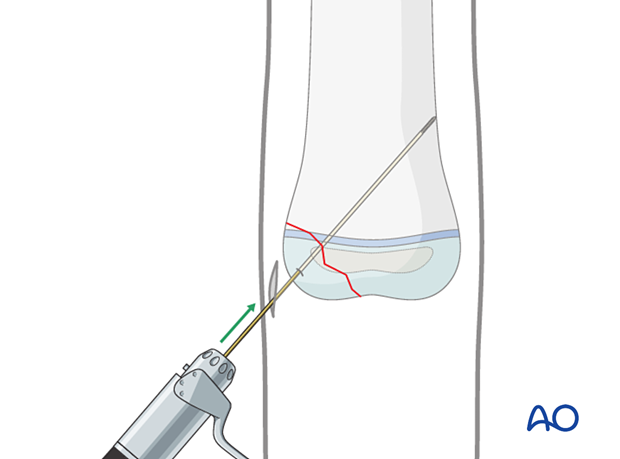
A stab incision is made directly over the entry point of the guide wire/screw. This is done to avoid skin damage, which causes necrosis and infection.
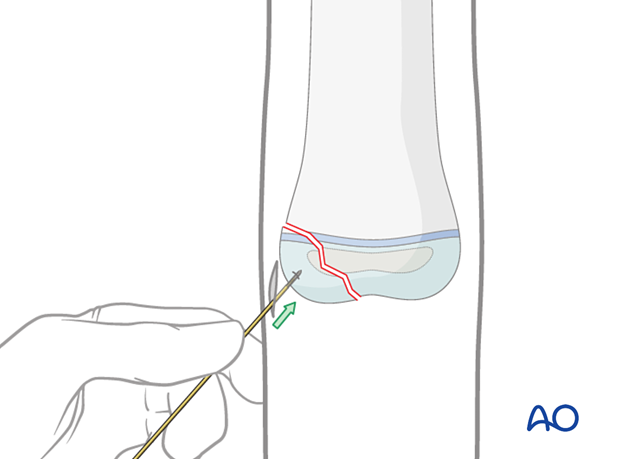
The guide wire for the cannulated screw (1.25 mm for screws up to 4.5 mm) is inserted manually through the skin incision onto the chosen entry point.
The guide wire is drilled into the free fragment and may be used to fine-tune the reduction.
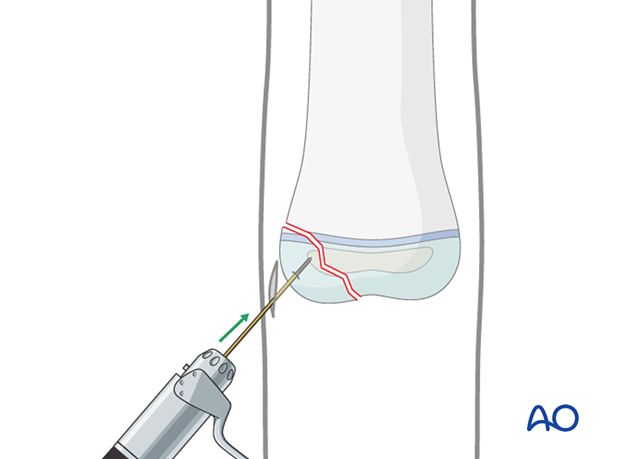
After reduction, the wire is further inserted across the fracture plane into the main fragment so that it just penetrates the far cortex.
Once the guide wire has been inserted, the reduction should be checked using image intensification (in younger children it is helpful to visualize the cartilage surface using arthrography).
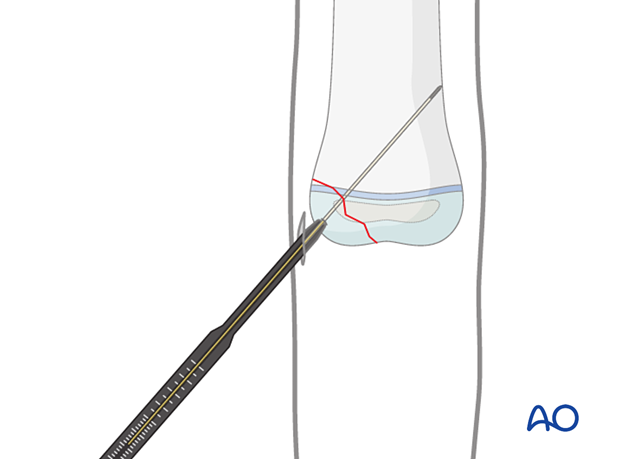
Once the reduction is satisfactory, the length of the screw is measured. The length of the unthreaded part of the screw must be longer than the depth of the small fragment.
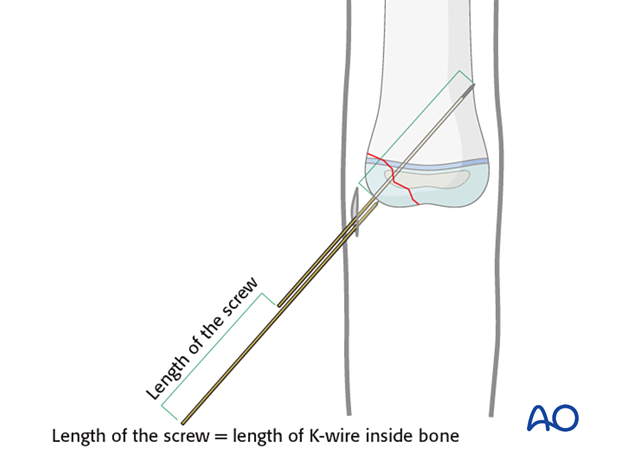
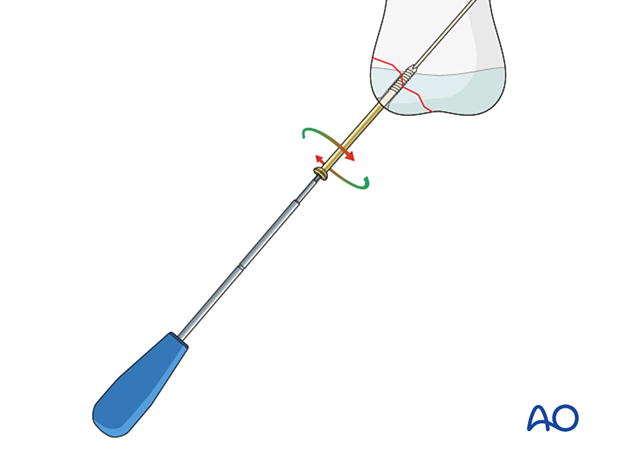
Slide the screw manually over the guide wire and only then attach the cannulated screwdriver.
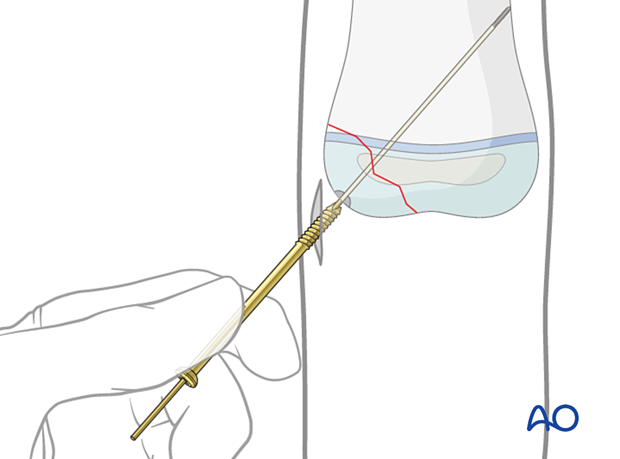
The screw should be inserted manually and not with a power tool.
Bony resistance should be felt throughout the screw insertion. Lack of resistance suggests that the screw is not correctly sited in the bone. If in doubt, check this in two planes (AP and lateral) using image intensification.
Correct reduction and fixation are similarly checked.
Additional screw insertion
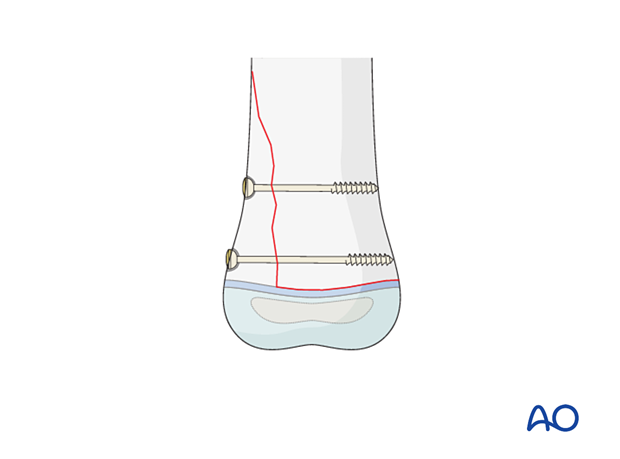
Depending on the location and/or the size of the fragments, a second, and possibly a third, screw is inserted in a similar manner.
For example, a sizeable metaphyseal fragment of a Salter-Harris II fracture in a large bone may require 2 screws for adequate stability.
Immobilization
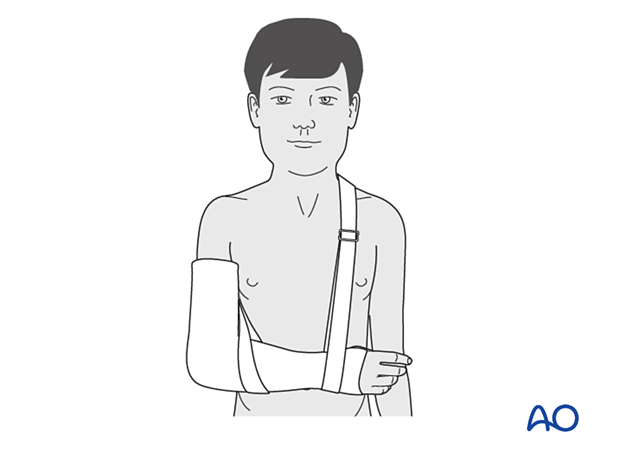
Cannulated screw fixation requires additional plaster cast fixation for pain management and immobilization.
In older compliant children a plaster cast is not always needed following stable fixation.
5. Screw removal
Screw removal is indicated if:
- Screw causes pain or subcutaneous irritation
- Screw crosses a physis in which further growth is anticipated
Removal of screws is a decision for the treating surgeon and must be discussed with the parents/carers.
Screw removal can be difficult for two reasons:
- Bony overgrowth
- Titanium screws adhere strongly at the bone/thread interface so that removal may not be possible, or attempts may result in breakage of the head of the screw. Stainless steel screws can be removed much more easily
Screw breakage
Parents/carers should be cautioned that screw breakage during removal is possible. In this event the screw remnant is left inside the bone, unless infection is present.
Broken-screw-removal kits are available.


