Anterolateral approach to the proximal humerus
1. Indication
The anterolateral (acromial) approach (Mackenzie) can be used for various treatments of proximal humeral fractures. It is especially useful for nailing and osteosynthesis of fractures of the greater tuberosity.
It is also recommended for minimally invasive plate osteosynthesis (MIPO).
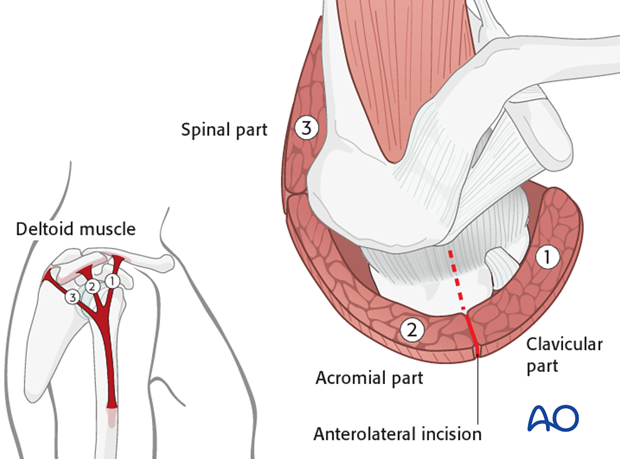
This incision is placed between the clavicular part (1) and acromial part (2) of the deltoid muscle, as illustrated.
Depending on the fracture morphology and foreseen osteosynthesis the extensions of the skin incision may vary but may not extend more than 5 cm distally to the acromion, to protect the axillary nerve.
2. Anatomy
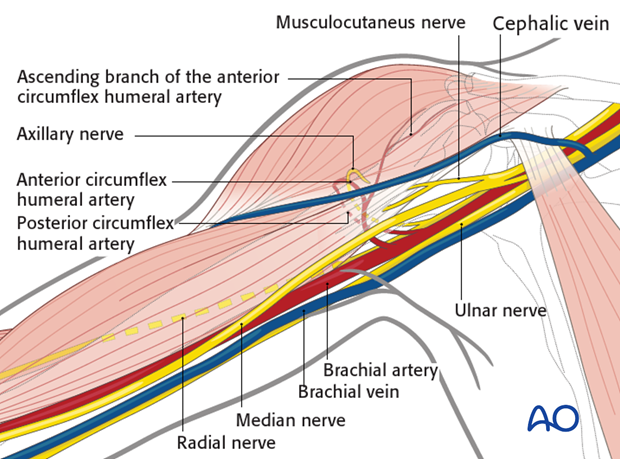
Neurovascular structures
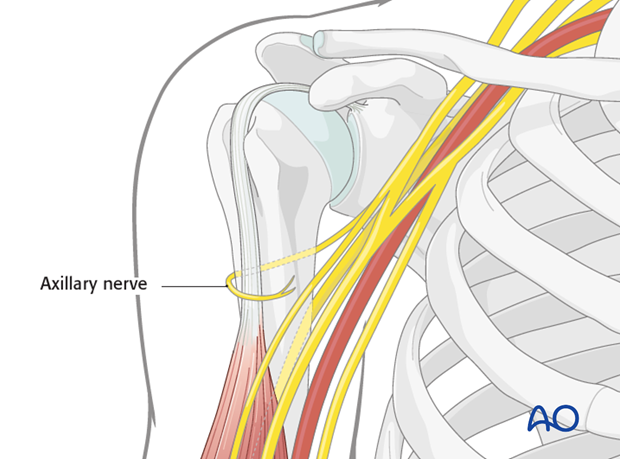
The course of the axillary nerve must be kept in mind.
Note: The anterior motor branch of the axillary nerve crosses the humerus horizontally about 6 cm distal to the lateral border of the acromion. This distance does not significantly vary and is reliable.
This approach utilizes a relatively avascular plane, away from the anterior and posterior circumflex humeral arteries.
3. Skin incision
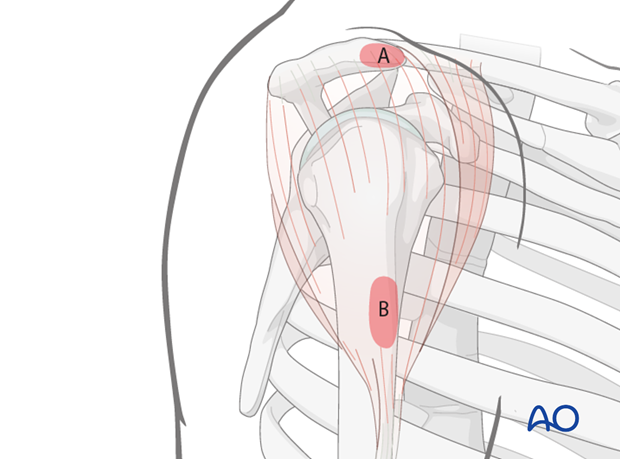
Anatomical landmarks
Anatomical landmarks for the anterolateral approach are:
A) Anterolateral edge of the acromion
B) Lateral side of the proximal humeral shaft
Both landmarks can easily be palpated.
Axillary nerve
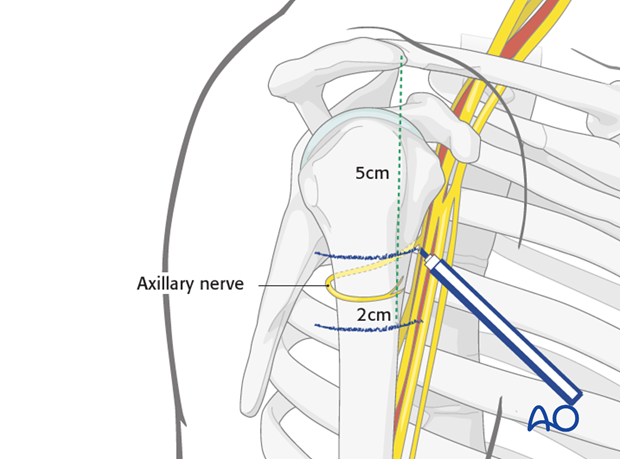
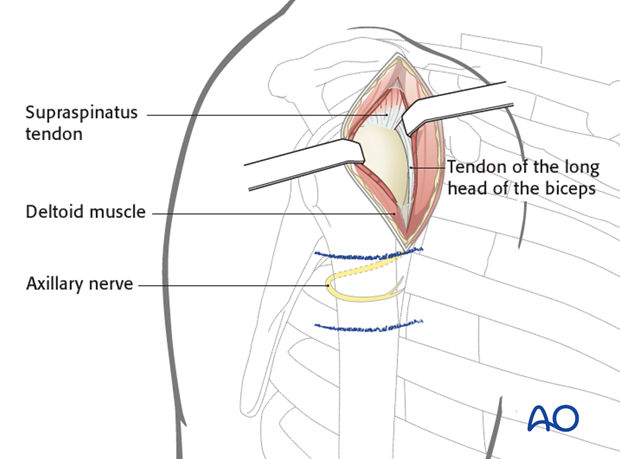
Before incising the skin, mark the distal limit of the approach, 5cm below the acromion, which is 1 cm above the course of the axillary nerve.
If a plate is to be passed underneath the axillary nerve, as in minimally invasive plate osteosynthesis (MIPO), mark a second line 2 cm distal to the first, below which the axillary nerve should not be encountered. The space between these two lines is the danger zone on the lateral humerus.
Skin incision
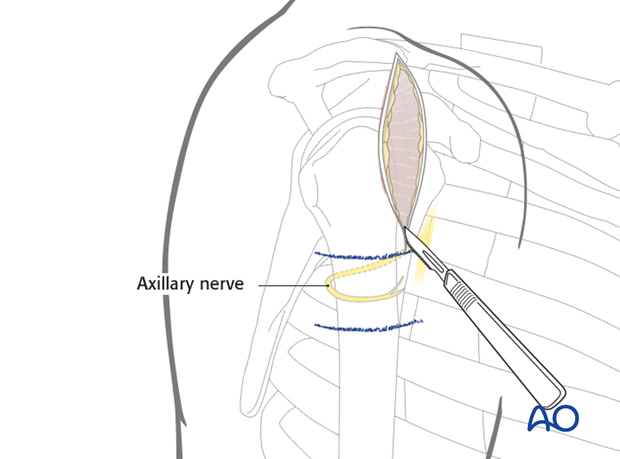
Make a skin incision from the anterior border of the acromion for 5 cm distally, parallel to the axis of the humerus.
4. Exposure of the anteromedial raphe
Expose and dissect the raphe of the deltoid muscle between the anterior and medial portion of its fibers. Split the raphe, in line with the deltoid fibers, to obtain a fairly avascular approach to underlying structures.
For maximum exposure, split the deltoid up to the margin of the acromion, but do not split it distally more than 5 cm from its origin to avoid damaging the axillary nerve and paralyzing the anterior part of the deltoid.
Palpate the axillary nerve on the deep surface of the deltoid muscle, distal to the incision. This nerve encircles the proximal humerus a little less than half way from the lateral margin of the acromion to the insertion of the deltoid muscle.
Hemorrhagic subdeltoid bursal tissue may need to be excised to expose the humeral head.
Pearl: stay suture
In order to protect the axillary nerve from uncontrolled distal dissection, a stay suture may be placed at the inferior border of the deltoid raphe.
5. Additional stab incision for minimally invasive plate osteosynthesis (MIPO)
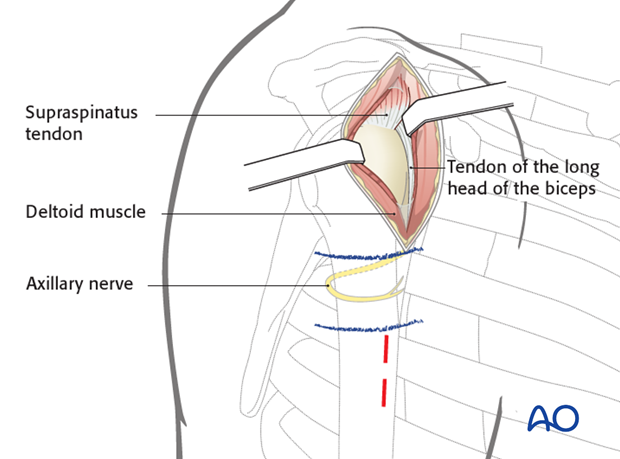
Safely below the marked (blue lines) axillary nerve, stab incisions may be made for screws to fix a plate to the humeral shaft. A special aiming device may be available for this purpose.
6. Exposure for intramedullary nailing
When the anterolateral approach is used for intramedullary nailing, a shorter skin incision may suffice. The length of the skin incision depends on fracture complexity.
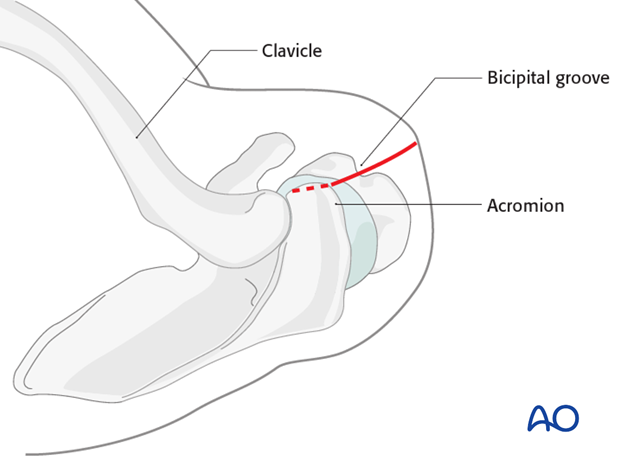
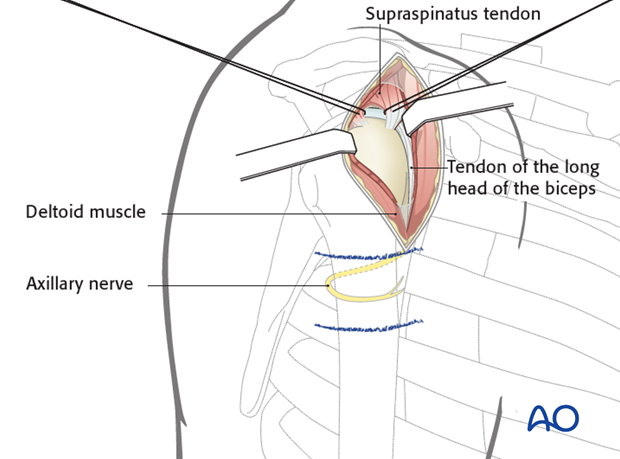
Prior to nail insertion, define the supraspinatus tendon by dissecting hemorrhagic subacromial bursa. Identify the tendon at its insertion. Make a short incision in line with its fibers and place stay sutures on each side of the insertion. Remember that the correct entry site lies deep to the tendon insertion and can only be accessed through the tendon.
In less complex cases with only slight fragment displacement and where reduction can be performed in a closed manner, the nail can be inserted through a minimal skin incision. In these cases, sutures can be omitted, however, they help to protect the tendon edges during nail insertion.
Through the split in the supraspinatus tendon, slightly expose the cartilage of the humeral head medial to the greater tuberosity. Avoid the tendon of the long head of the biceps.

7. Entry point for straight nails
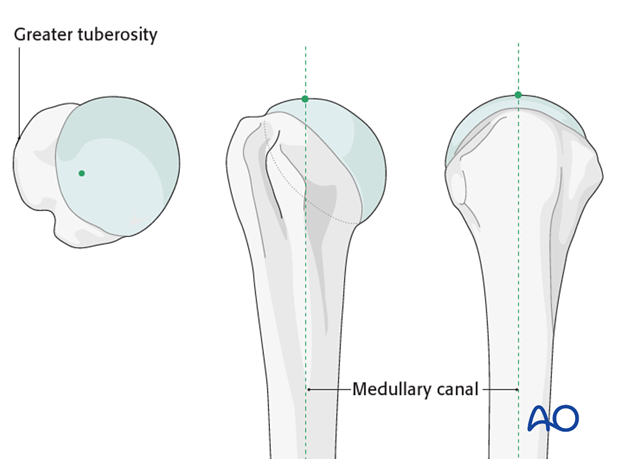
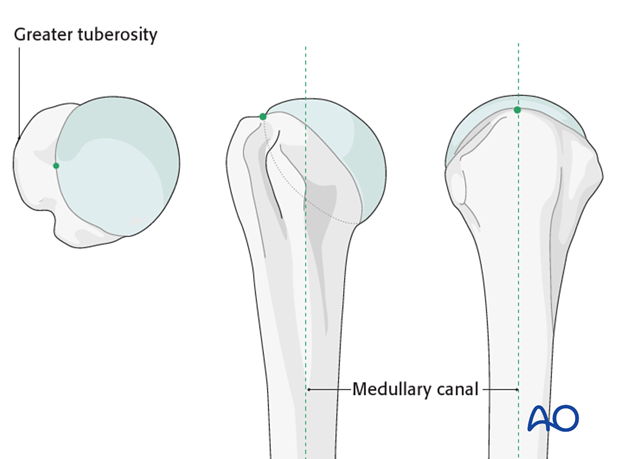
The ideal entry point is located in straight line with the axis of the medullary canal. One can find the correct entry point medial to the greater tuberosity, typically at the highest point of the humeral head slightly posterior to the bicipital groove. Insert a guide pin in this location.
8. Entry point for bent nails
The ideal entry point is usually located just medial to the greater tuberosity, slightly lateral to the axis of the medullary canal on the AP view and in line with humeral axis on the lateral view. Insert a guide pin in this location.
9. Wound closure
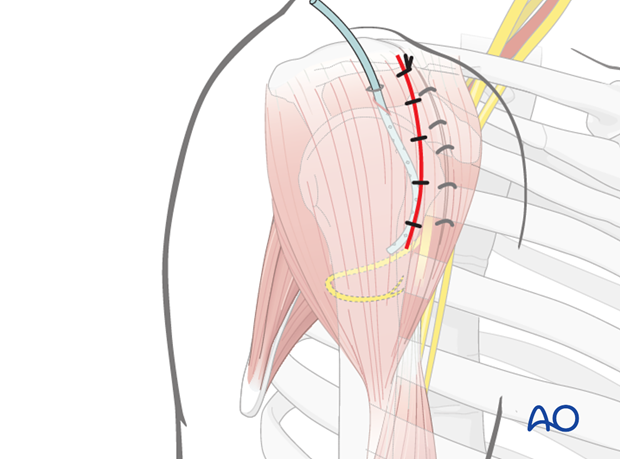
After surgery irrigate the wound. Some surgeons place a drain beneath the deltoid muscle.
Close the anteromedial raphe, the subcutaneous tissues, and the skin.
