Fracture management with minimal resources
1. General considerations
Introduction
Fractures of the proximal femur should be treated operatively.
They should only receive nonoperative fracture treatment if there are neither the appropriate care facilities nor skills for surgical treatment.
Nonoperative treatment means that the patient will be in some form of traction for at least 6 weeks.
Diagnosis and decision making
Once a radiological diagnosis has been made, a decision about nonoperative management can be taken.
For nonimpacted intracapsular fractures, the best nonsurgical care is to relieve pain and mobilize the patient despite the fracture. These fractures will usually not unite with nonsurgical treatment, and mobilization of the patient as a whole will minimize systemic complications.
If a radiological diagnosis is not available, the possibility of a displaced intracapsular fracture of the proximal femur may be suggested by external rotation with slight to moderate shortening (2.5–5 cm), which increases only slightly with proximally directed pressure on the leg. Nonoperative treatment of such patients is not based upon bone healing, which, as noted, does not occur without surgical treatment. Traction can be omitted or discontinued, and the patient should be mobilized as soon as comfort permits.
If there is marked thigh shortening that increases progressively or is associated with palpable bone deformity, the patient is more likely to have an extracapsular fracture with much higher healing potential. Patients with these injuries are reasonable candidates for 6 weeks of traction, as described below, followed by mobilization out of bed to avoid excessive deformity.
For proximal femur fractures that are likely to be extracapsular (intertrochanteric or pertrochanteric), the nonoperative regimen is as follows.
Skin traction
The preliminary treatment usually is skin traction, later converted to skeletal traction.
Disadvantages of prolonged skin traction are:
- Inadequate pain relief
- Loosening
- Constriction
- Friction with skin necrosis
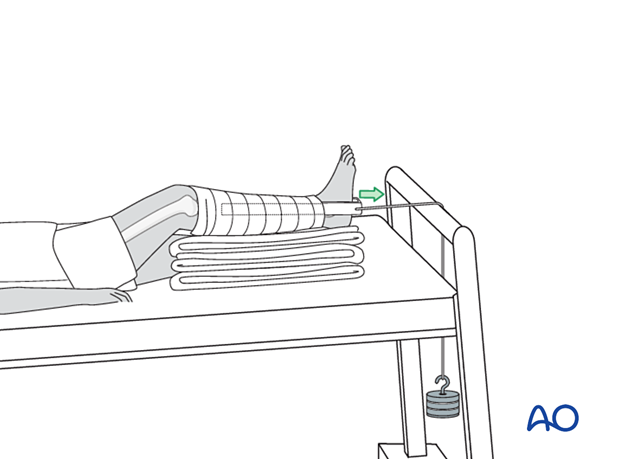
If skin traction is likely to be used for more than 24 hours, greater patient comfort and better control of the fracture can be achieved using balanced skin traction (Hamilton-Russell), which allows for a slightly flexed knee and hip and elevation of the extremity.
This configuration of traction and leg support also can be adjusted to control femoral rotation by directing the upward support medially or laterally.
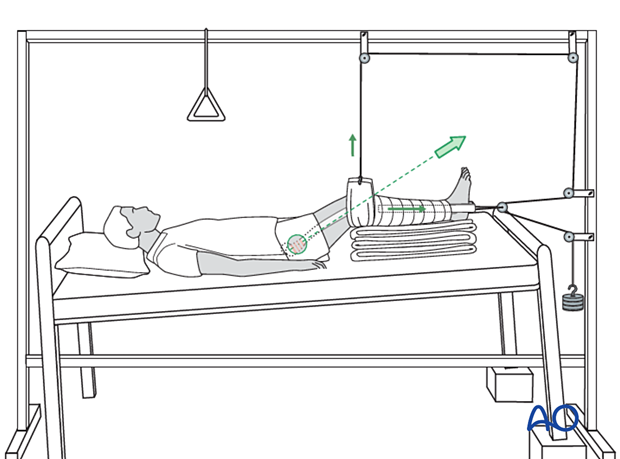
Skeletal traction
As soon as the decision is made that traction will be the definitive treatment, conversion to skeletal traction should be done.
Skeletal traction can be applied either through a distal femoral or proximal tibial pin.
Skeletal traction may have multiple serious complications:
- Pin-track infections
- Muscle wasting
- Prolonged bed immobilization with resultant bed sores
- Increased resource utilization (nursing care)
- Less than adequate fracture reduction
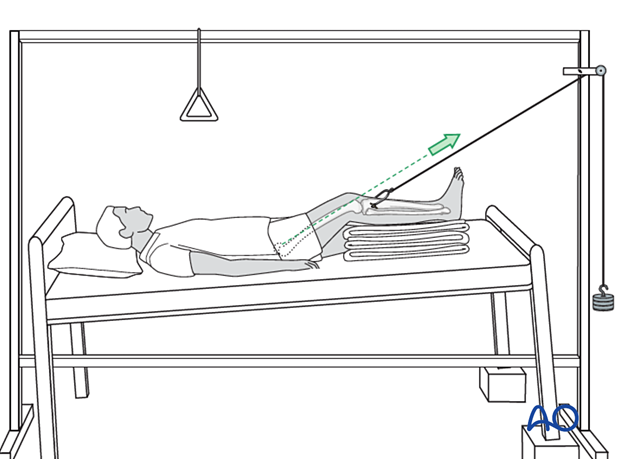
2. First Aid
The ABC of primary care for the injured always takes precedence over the fracture treatment. Once the safety of the patient is established, attention is directed to the fracture.
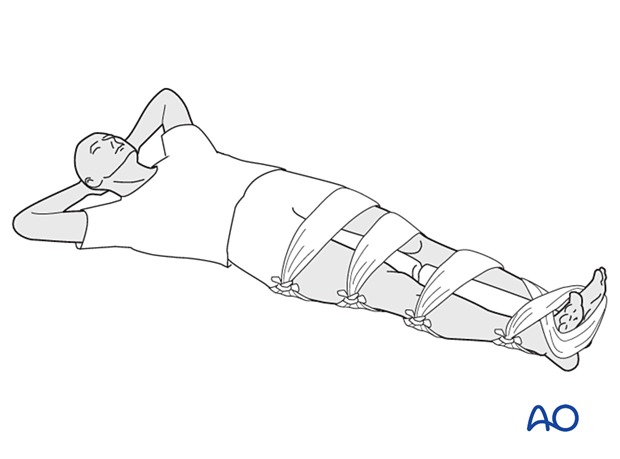
It is important in treating any femoral fracture to splint the whole leg as soon as possible and before transport of the patient. For that purpose, you need two firm boards or sticks along the leg, suitably padded, one on the medial aspect of the leg and one along the lateral aspect of the leg and ipsilateral torso.
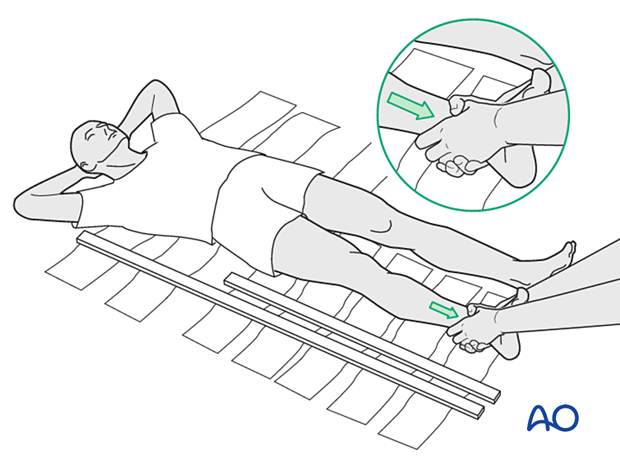
Any soft material such as clothing, blankets, etc can be used as emergency padding.
The splints should then be kept in place by bandages around both splints …
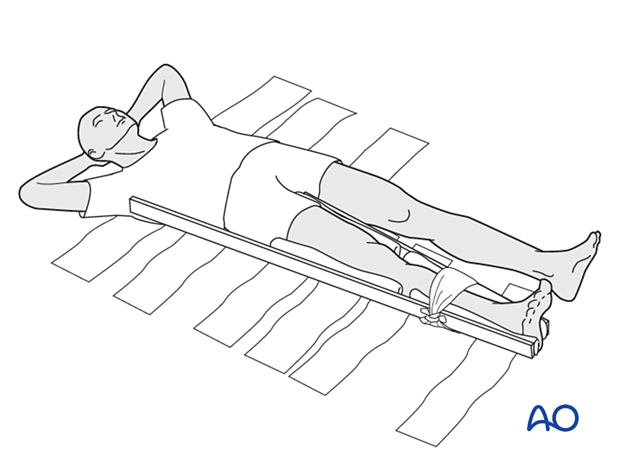
... and the leg as well as the body.
Suitably splinted, the patient can be transported to the chosen hospital facility.
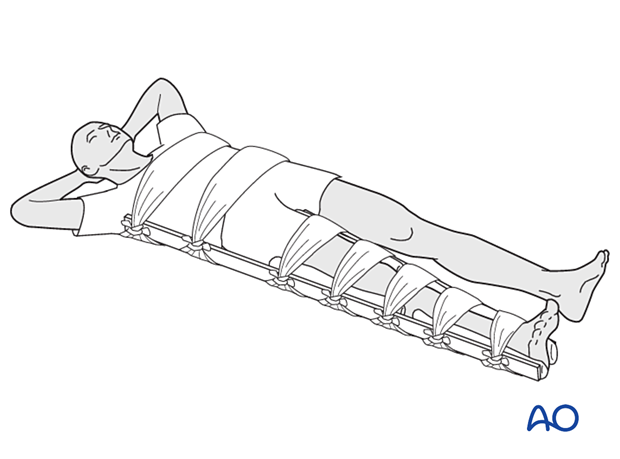
If no boards are available, some stabilization can be achieved by splinting the fractured leg to the uninjured leg, with padding placed between the two legs.
3. Skin traction
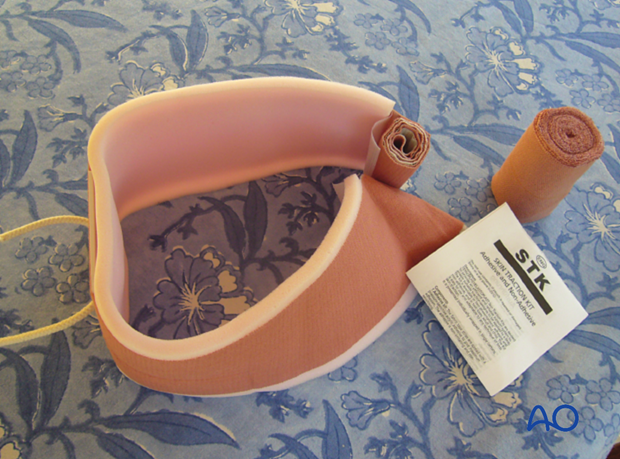
Application of skin-traction kit
This photograph shows a commercially available skin-traction kit.
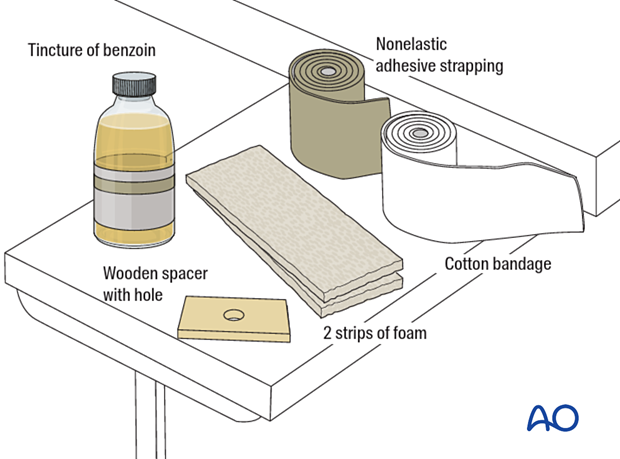
A simple skin-traction kit can be made easily with:
- Roll of nonelastic adhesive strapping (approximately 3 inches, 8 cm, wide)
- Foam padding for the malleolar region
- Wooden spacer block (suitably drilled for cord attachment)
Before applying the adhesive traction strip, paint the skin with friar’s balsam (tincture of benzoin) or equivalent.
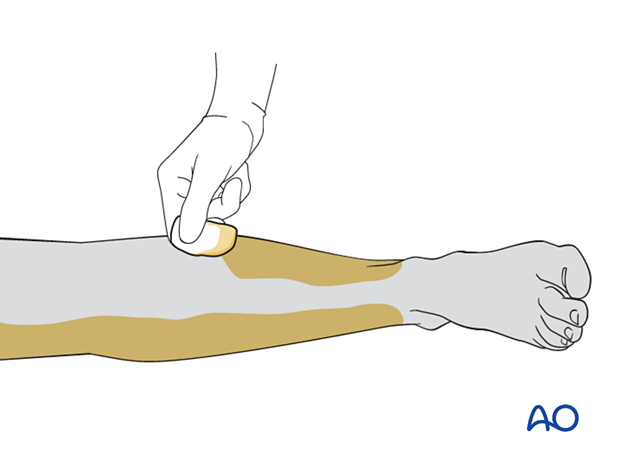
Apply the strip to the lower leg from the level of the knee to the supramalleolar region.
Apply the strapping to the inner side of the leg, then unroll it a little further to allow placement of the spacer and the foam. Then apply it to the outer side of the leg.
It is important to ensure that the wooden spacer lies transversely, ie, parallel to the sole of the foot.
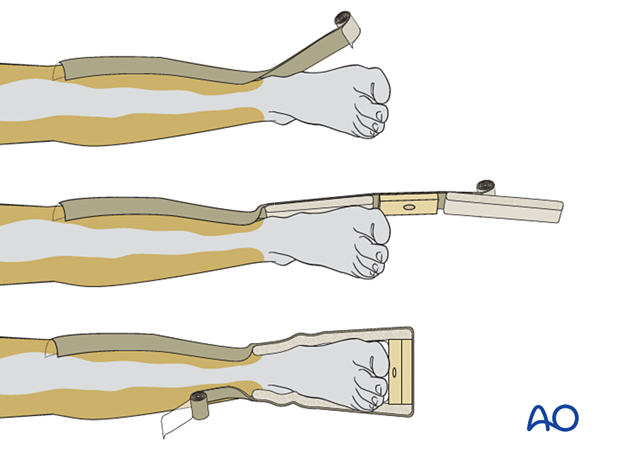
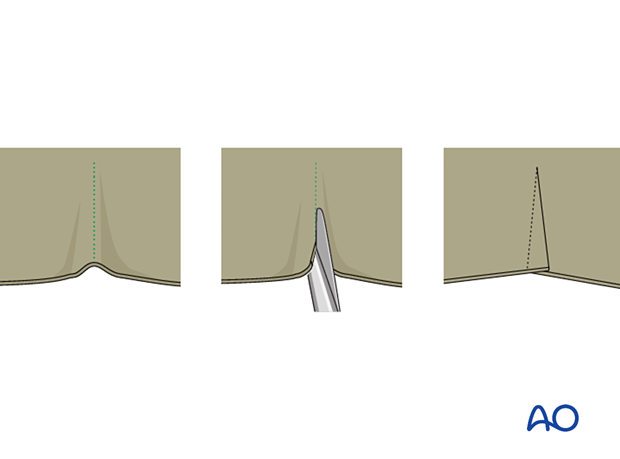
To prevent the development of blisters, the skin traction needs to be applied without folds or creases in the adhesive material, and the covering bandage should be nonelastic.
Should a crease be inevitable due to the contour of the limb, the creased area should be lifted and partially slit transversally, and the edges overlapped.
Once the adhesive strip is satisfactorily in place, ensuring that the padded lower section overlies the malleoli, an inelastic bandage is carefully wrapped around the limb from just above the malleoli to the top of the strip.
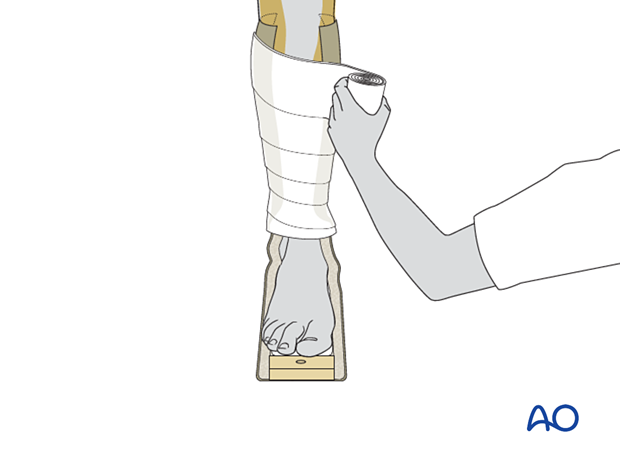
Apply the overlying bandages spirally, overlapping by half.
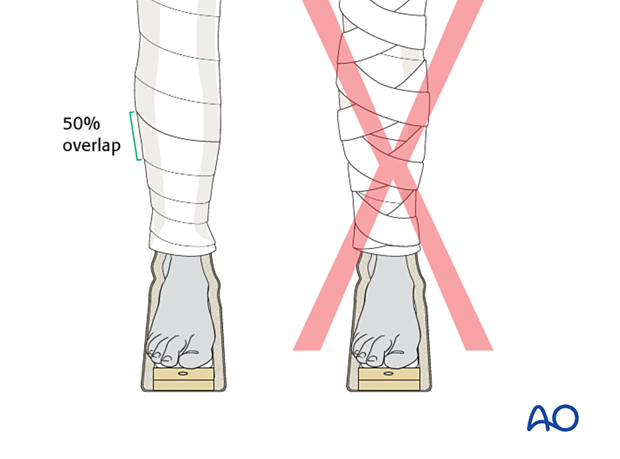
Positioning of the lower extremity
As the proximal fragment position can not be influenced, use traction to align the distal extremity to align the fracture. Typically, this requires mild flexion, abduction, and slight external rotation.
Straight skin traction
With straight skin traction, add padding under the patient’s calf to keep the heel from pressing on the bed beneath it.

Balanced skin traction
To apply balanced skin traction, a dedicated orthopedic bed or a standard bed in combination with a mobile Balkan beam frame is needed.
Place a padded sling behind the slightly flexed knee and apply skin traction to the lower leg. The traction cord and pulley system are shown here.
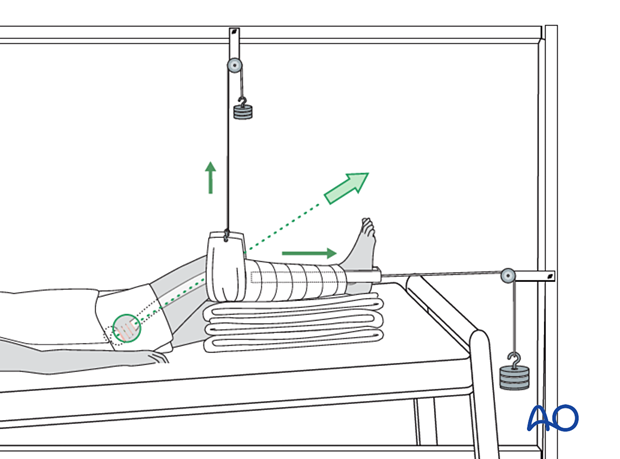
The principle of the parallelogram of forces determines that the upward pull of the sling and the longitudinal pull of the skin traction create a resulting force in the line of the femur, as illustrated.
This configuration of traction and leg support can also be adjusted to control femoral rotation by moving the overhead bar medially (internal rotation) or laterally (external rotation).

A simpler alternative to this technique involves two separate systems:
- A sling suspended from the overhead frame or supported with a rope and pulley counterweight to provide an upward force, which lifts the leg off the bed
- Longitudinal (distal) traction applied with skin or skeletal technique
The resulting vector force, as illustrated, is oblique (the vector sum of the upward and distal forces applied by the two weights).
4. Skeletal traction
Traction options
Skeletal traction can be applied either through a distal femoral or proximal tibial pin. The application of the latter is shown here.
Teaching video
AO teaching video: Skeletal traction
Preparation for pin application
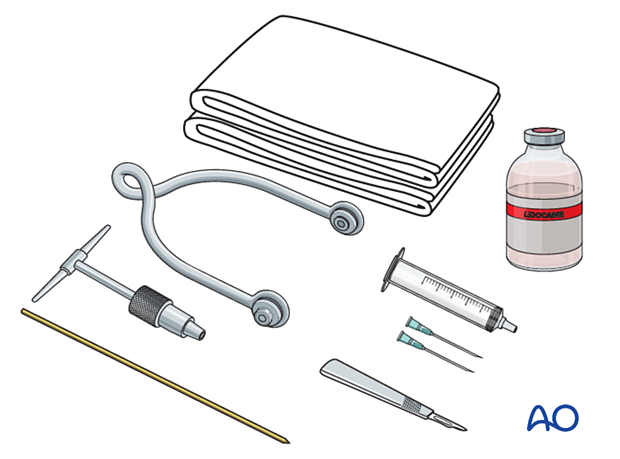
This is greatly aided by the use of a preassembled, sterile pack containing the following items:
- Sterile towels
- Disinfectant
- Syringe
- Needles
- Local anesthetic
- Scalpel with a pointed blade
- Sharp pointed Steinmann pin or Denham pin
- Jacobs chuck with T-handle
- Stirrup
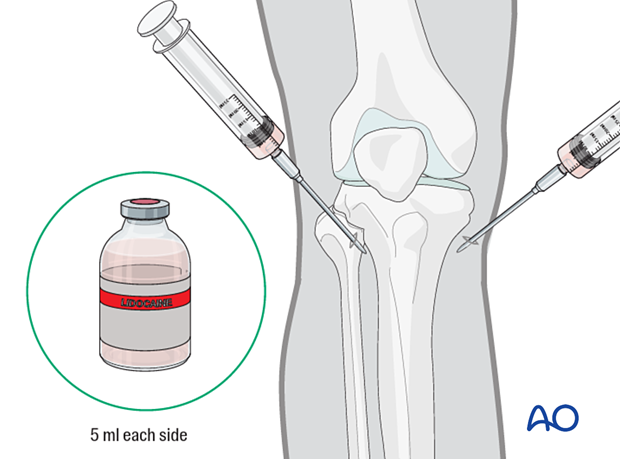
After painting the skin with antiseptic and draping with sterile towels, inject a bolus of local anesthesia (5 ml of 2% lidocaine) on each side of the tibial tuberosity into the lateral skin at the proposed site of pin insertion and medially at the anticipated exit point, infiltrating down to the periosteum.
Pin insertion
At the entry point, make a stab incision through the skin with a pointed scalpel.
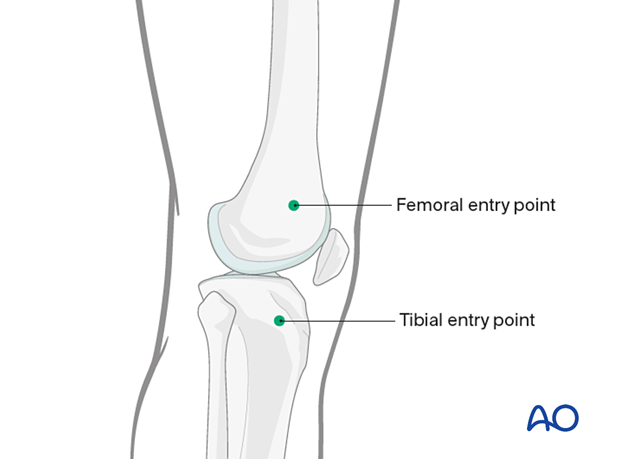
Insert a Steinmann, or preferably a Denham pin (a Denham pin has a short threaded section in the center to prevent side-to-side motion of the pin in the bone), mounted in the T-handle, manually at a point about 2 cm posterior to the tibial tuberosity.
If a femoral pin is preferred, enter the pin slightly proximal to the superior pole of the patella.
As the pin is felt to penetrate the far cortex, check that the exit will coincide with the area of local anesthetic infiltration. If not, inject additional local anesthetic. Once the point of the pin clearly declares its exit site, make a small stab incision in the overlying skin.
Once the pin is in place, ensure that there is no tension on the skin at the entry and exit points. If there is, then a small relieving incision may be necessary.
Application of stirrup
The stirrup must be freely mobile around the traction pin to prevent rotation of the pin within the bone. Rotating pins loosen quickly and significantly increase the risk of pin-track infection.
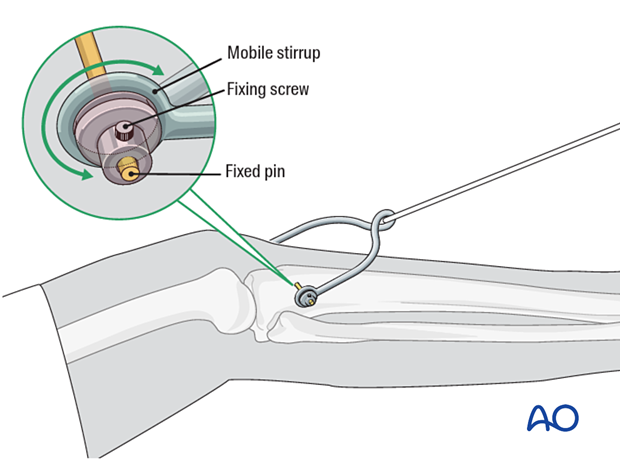
Positioning of the lower extremity
As the proximal fragment position can not be influenced, use traction to align the distal extremity to align the fracture. Typically, this requires mild flexion, abduction, and slight external rotation.
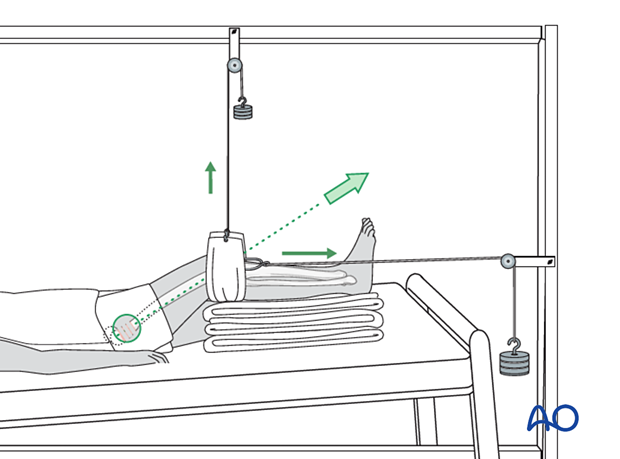
Setup of skeletal traction
A dedicated orthopedic bed, or a standard bed combined with a mobile Balkan beam frame, is needed.
Place a padded sling behind the slightly flexed knee and apply skin traction to the lower leg. The traction cord and pulley system are shown here.
The principle of the parallelogram of forces determines that the upward pull of the sling and the longitudinal pull of the skin traction create a resulting force in the line of the femur, as illustrated.
This configuration of traction and leg support can also be adjusted to control femoral rotation by moving the overhead bar medially (internal rotation) or laterally (external rotation).
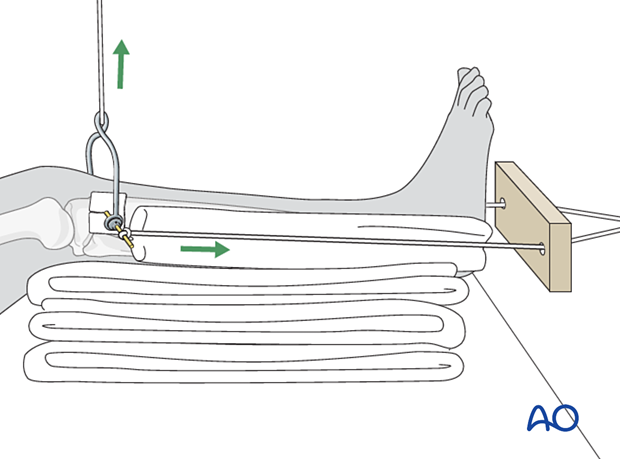
Optionally, the upward force can be applied with a rope tied to the stirrup. Distal force can then be applied separately via a loop of rope tied to each end of the pin and running distally along the medial and lateral surfaces of the calf. This must be padded to protect the skin, and a spreader (usually wood) distal to the foot is essential to avoid pressure on the malleoli.
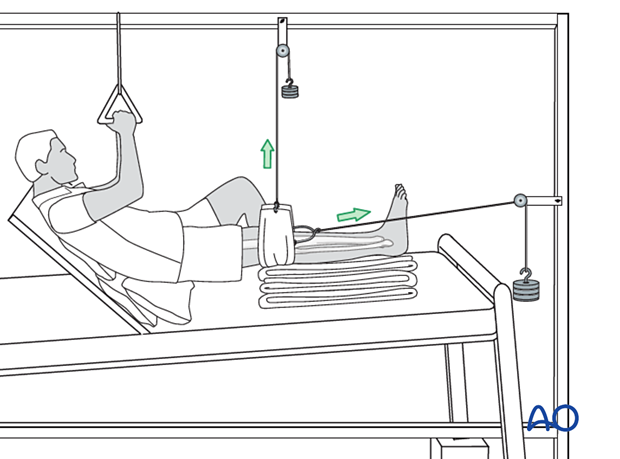
Often the simplest alternative is to use a single rope from the stirrup, directed overhead and distally through a pulley (and then through a second pulley at the foot of the bed). The position of the first pulley determines the force vector (direction) of the traction, presuming the patient remains in the selected location. Weight and direction of the traction should be adjusted to lift the knee approximately one fist-width off the bed. Pillows under the calf support the lower leg, prevent excessive knee flexion, and keep the heel off the bed, as shown.

Pin-site care
To prevent pin-track infection, apply a slit gauze swab (sponge) as a dressing around the pin. The gauze swab should only be changed when saturated.
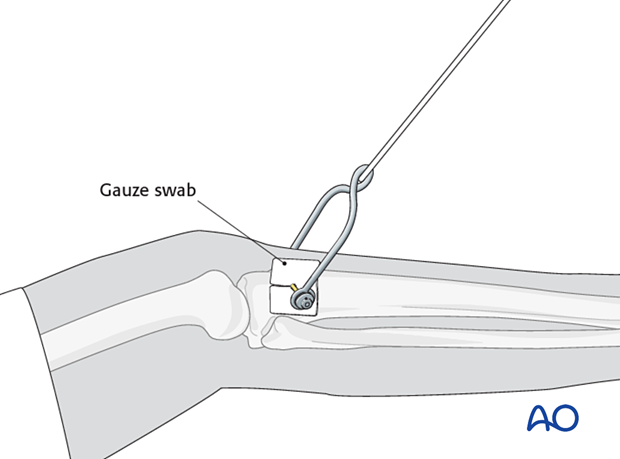
5. Assessment of reduction
After traction has been set up, take an x-ray to check for acceptable fracture alignment.
Readjust as necessary.
6. Mobilization in bed
Assisted active mobilization and chest physiotherapy should start from the first day.
With the aid of a trapeze bar, as shown, patients can lift themself, and the traction system allows mobilization of the knee.
7. Aftercare
Pin-site care
Pin sites should be monitored for increased drainage and erythema as these can be signs of pin loosening.
If local care is inadequate, antibiotics and/or pin removal and replacement elsewhere may be necessary.
Mobilization
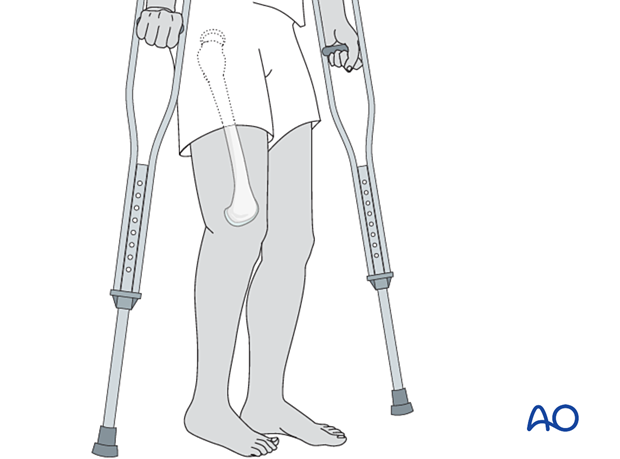
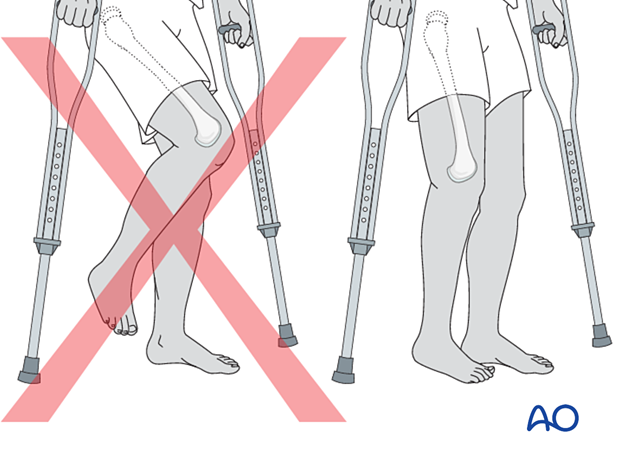
After 6 weeks of traction, mobilizing with weight-of-the-leg weight bearing with walking aids should be attempted.
At this stage, an x-ray is highly desirable to give information on healing and alignment. Robust callus suggests that progressive weight bearing is possible.
If radiography is not available, mobilization in bed can typically be started 6 weeks after injury and progressed as tolerated, encouraging the patient to use walking aids for support to minimize pain at the fracture site. The ability to bear full weight without pain is a good sign of fracture healing.
Discharge to home should be delayed until the patient can get in and out of bed independently and is mobile on crutches.
The patient should be advised not to sit for prolonged periods in a chair as this will lead to a flexion contracture at the hip joint.
