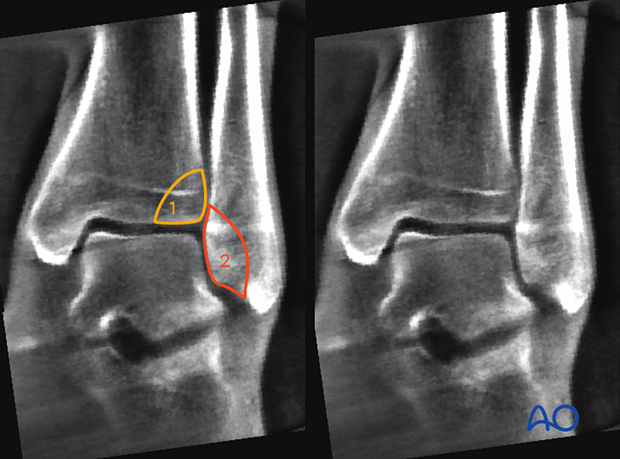
Intraoperative imaging of the ankle
1. Introduction
Intraoperative imaging is essential in reduction and fixation of fractures with or without an unstable syndesmotic injury.
The knowledge of anatomical relations and the identification of landmarks facilitate anatomical reduction and implant placement.
The following are particularly useful:
- Mortise view
- Lateral view
- Intraoperative 3D images
The following represents ideal imaging with the patient placed in the supine position.
The relation between the foot and the C-arm and the foot is the same for patients in the lateral decubitus and prone positions. The orientation of the C-arm has to be adjusted accordingly.
Taking intraoperative images of the contralateral ankle for comparison purposes can be useful to ensure that an anatomical reduction of the injured ankle is achieved.
2. Mortise view
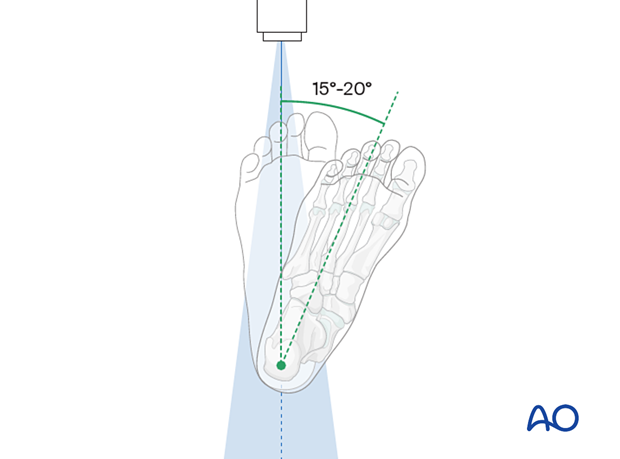
Positioning for optimal view
- The beam is placed perpendicular to the tibia
- The foot is rotated internally by 15-20°
- The beam is centered at the tibiotalar joint-line
- The ankle joint is in neutral position
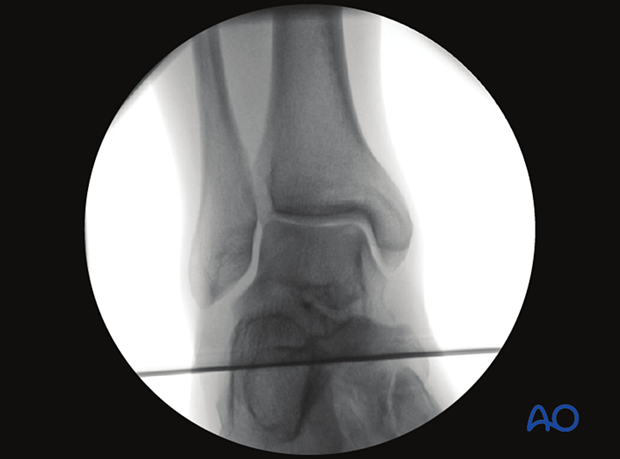
Verification of optimal view
The optimal view is obtained when the:
- joint space is clearly visible
- No over projection of fibula-talus or tibia-talus overlap
- joint space is symmetrical
If the optimal view cannot be obtained, this is most likely due to a nonreduced fracture.
Anatomical landmarks and lines
The following lines and landmarks can be observed:
- Fibula
- Tibia
- Talus
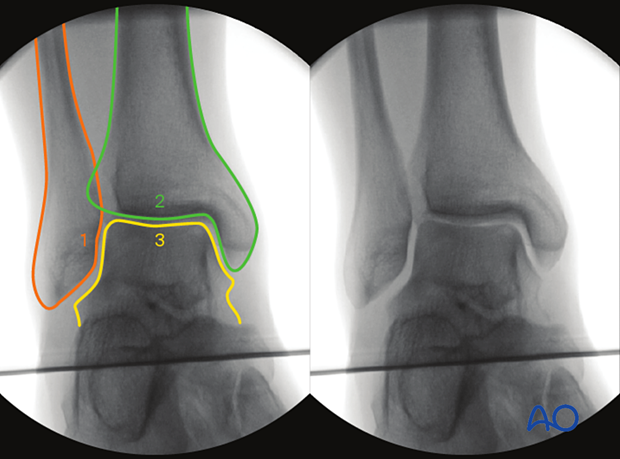
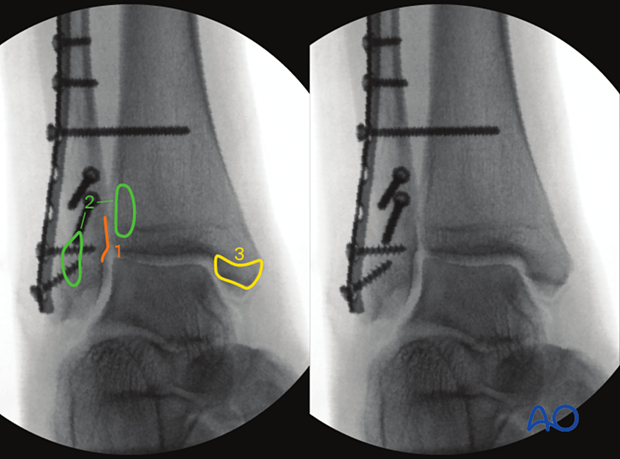
- Medial spike of the fibula ("Weber nose")
- Syndesmotic region
- Insertion of deltoid ligament
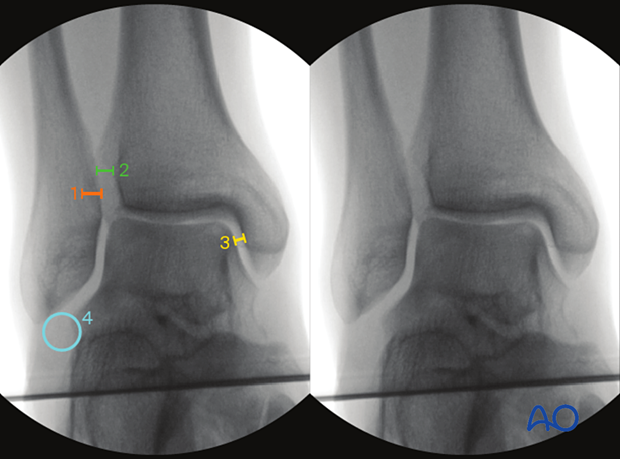
- Tibiofibular overlap > 10 mm
- Tibiofibular clear space (TFC) < 6 mm
- Medial clear space < 4 mm (less than or equal to superior clear space)
- Weber ball (Dime sign)
Definition Weber ball: Circle between distal fibula and the lateral aspect of the talus.
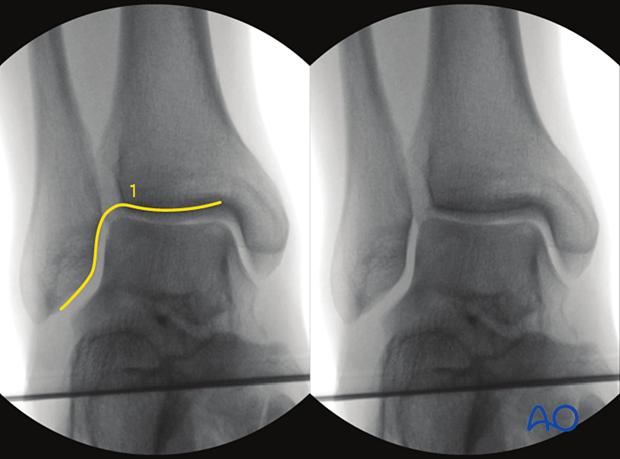
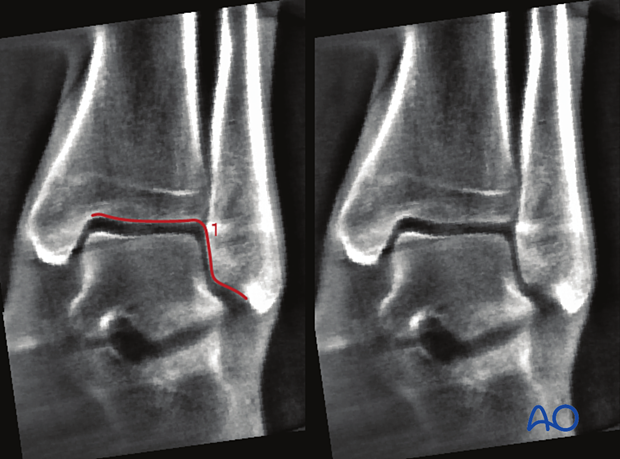
- Shenton’s line of the ankle
Definition of Shenton’s line: Medial aspect of the fibular joint surface and distal tibal joint surface.
Both an uninterrupted Shenton's line and presence of the Weber ball indicates correct fibular length.
What can be observed
This view is particularly useful to identify:
- Asymmetrical joint space
- Visible gaps or steps in fracture reduction
- Implant malplacement
- Irregular overlaps or clear spaces
- Incorrect length of fibula (Weber ball does not meet fibular tip, interrupted Shenton's line)
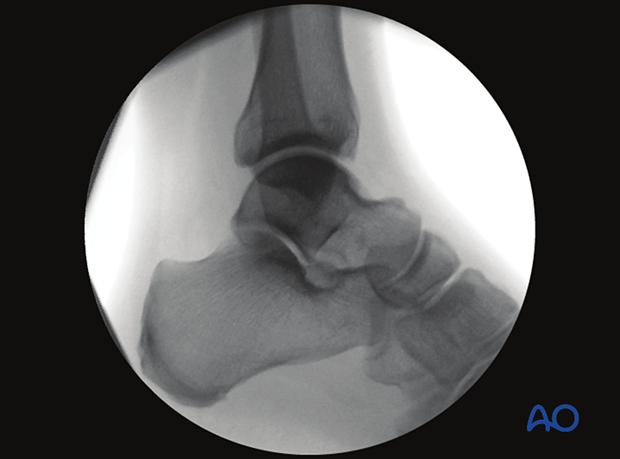
3. Lateral view of the ankle
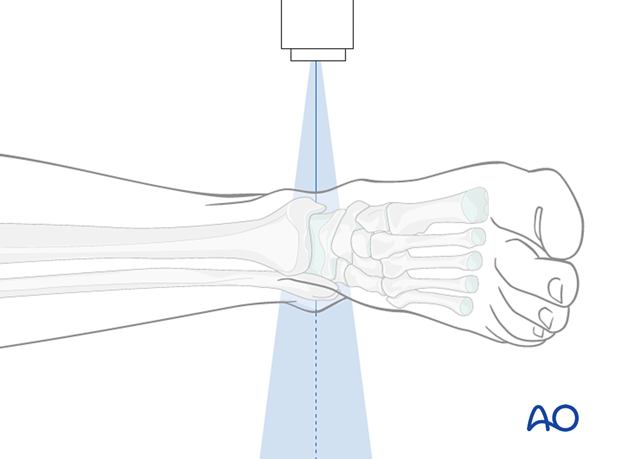
Positioning for optimal view
- The beam is placed perpendicular to plane created by the tibia and the foot.
- The beam is centered at the tibiatalar joint space
- The ankle joint is in netural position
Verification of optimal view
The optimal view is obtained when:
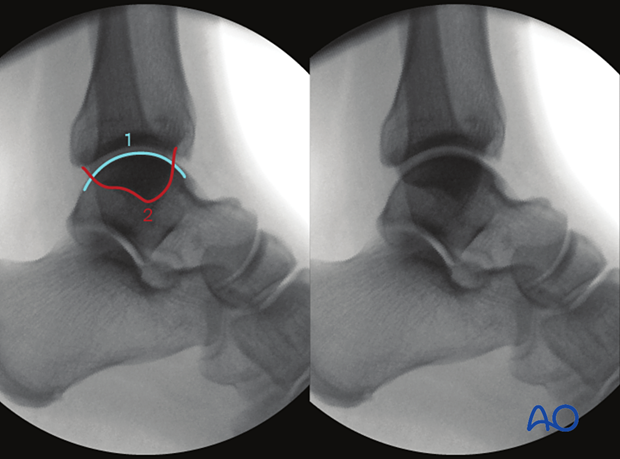
- Both talar shoulders are in one plane
- Joint space is clearly visible
- joint space is symmetrical
- Talar, tibial, and fibular assessment is possible
Anatomical landmarks and lines
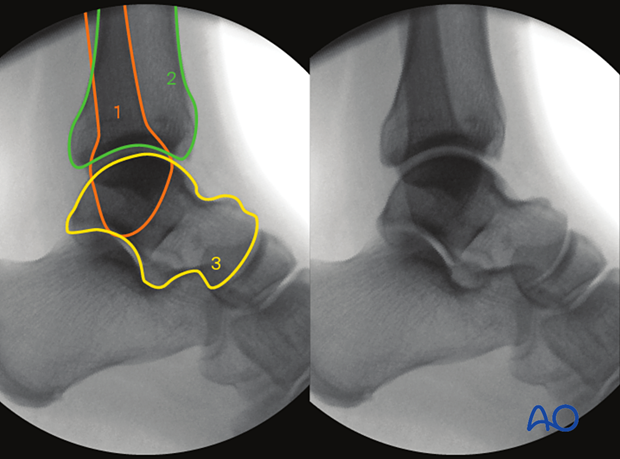
The following lines and landmarks are seen:
- Fibula
- Tibia
- Talus
- Talar shoulders projected as one line
- Medial malleolus
What can be observed
This view is particularly useful to identify:
- Asymmetrical joint space
- Visible gaps or steps in fracture reduction
- Anterior or posterior position of the fibula compared
to contralateral side - Implant misplacement
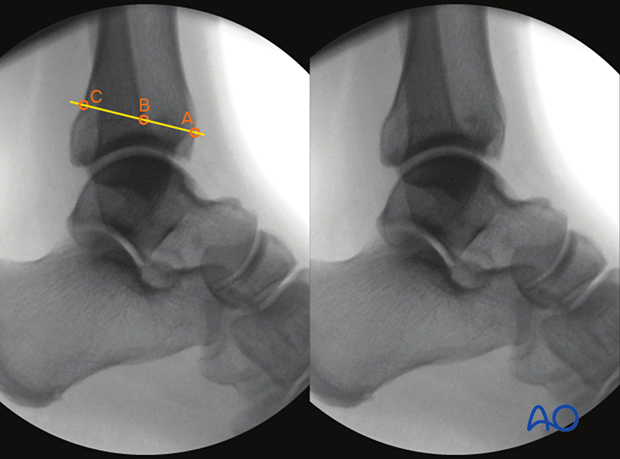
- Anteroposterio tibiofibular (APTF) ratio AB/BC = 0.94, indicating correctly reduced syndesmosis
- Anterior cortex of the tibia at the level of the physeal scar
- Intersection of the anterior cortex of the fibula and the tibial physeal scar
- Intersection of the line crossing A and B and the posterior cortex of the tiba
4. Intraoperative 3-D images (3-D C-arm)
Positioning for optimal view
- Ankle in neutral position (not in plantarflexion as this would shift the talus anteriorly)
- The heel is placed freely to prevent anterior shift of the talus. The lower limb is supported under the calf.
- The beam is centered in AP and lateral combined at the tibiotalar joint line
- It must be possible to rotate the C-arm freely 190° around the ankle joint
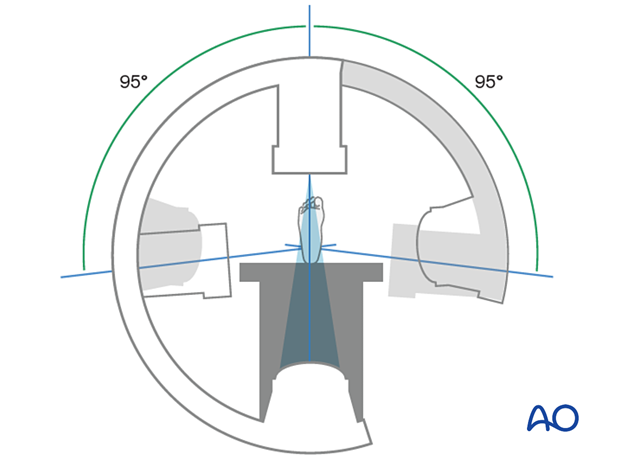
Axial plane (10 mm proximal to the talar joint line)
Verification of optimal viewThe optimal view is obtained when the:
- talofibular joint space is symmetrical
- fibula is anatomically reduced in the tibial incisura
- fibula position is identical to the contralateral
- Harmonic line of anterior cortices of tibia and fibula
- Harmonic line of posterior cortices of tibia and fibula
The correct placement of the axial plane is perpendicular to the sagittal and coronal plane.
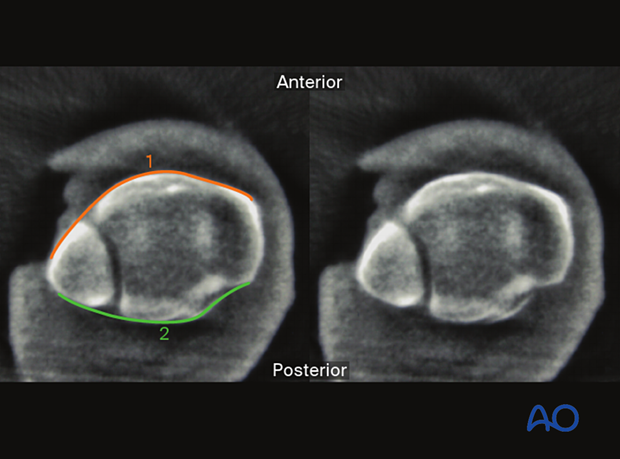
The following lines, landmarks and parameters can be observed:
- Anterior aspect of the fibula
- Anterior aspect of the tibia
- Medial malleolus
- Tibiofibular joint line
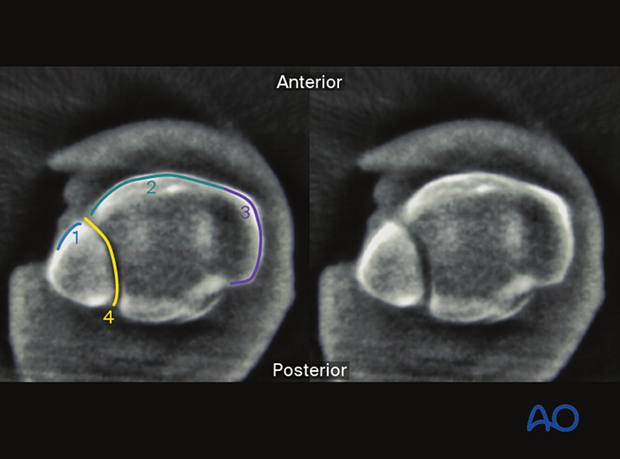
This view is particularly useful to identify:
- Asymmetrical tibiofibular joint space
- Anterior or posterior position of the fibula compared to contralateral side (irregular incisura)
- Implant misplacement
- Visible gaps or steps
- Failure to address syndesmotic avulsions
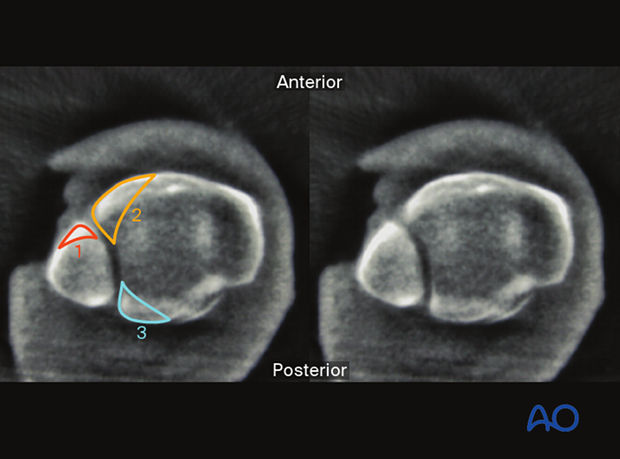
Typical fracture patterns that are easily recognized are:
- Wagstaffe – Le Fort fragment
- Tubercule de Chaput fragment
- Posterior malleolus or Volkmann fragment
Axial plane (5 mm distal to the talar joint line)
Verification of optimal viewThe optimal view is obtained when the:
- Tibia, fibula, and talus are visible
The correct placement of the axial plane is perpendicular to the sagittal and coronal plane.
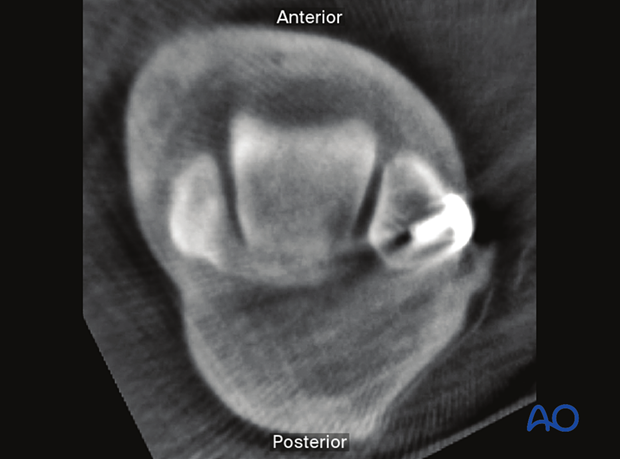
The following lines and landmarks and parameters can be observed:
- Medial joint surface of the fibula
- Lateral joint surface of tibia
Both medial and lateral talar surfaces
Fibular rotation may also be observed.
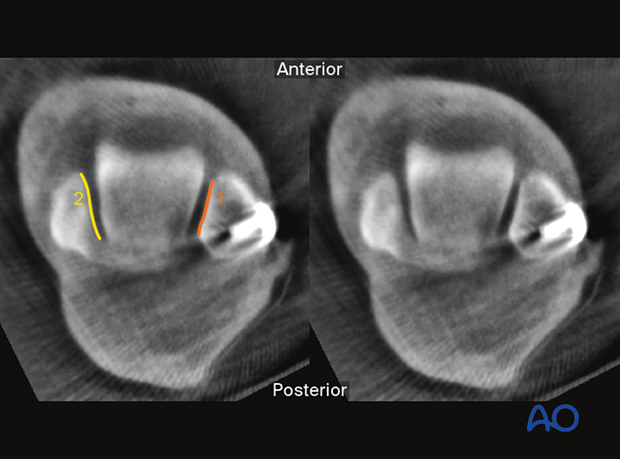
This view is particularly useful to identify:
- Asymmetrical joint space
- Rotational malalignment of the fibula
The following lines and landmarks can be observed:
- Talar shoulders
- Distal tibial joint surface
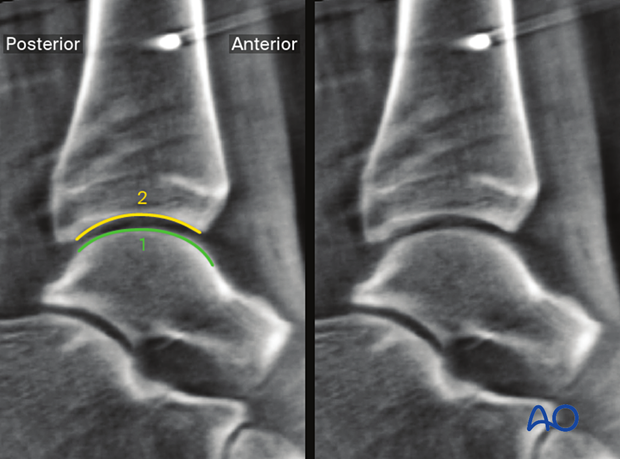
This view is particularly useful to identify:
- Implant misplacement
- Visible gaps or steps
- Anterior shift of the talus
Typical fracture patterns that are easily recognized are:
- Tubercule de Chaput fragment
- Posterior malleolus or Volkmann fragment
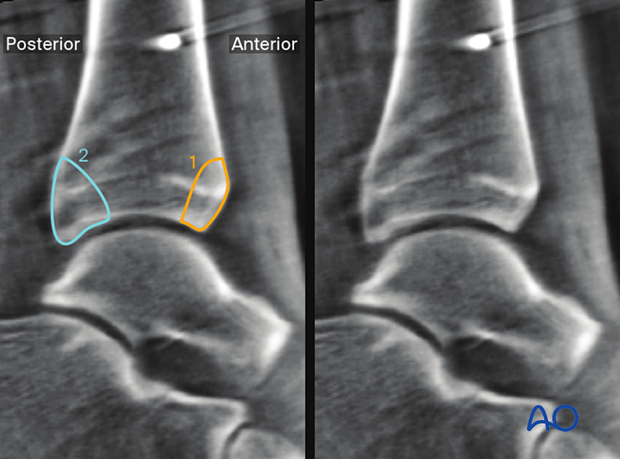
Coronal plane
Verification of optimal viewThe optimal view is obtained when the:
- The correct placement of the coronal plane is perpendicular to the sagittal and axial plane.
- Symmetrical joint line
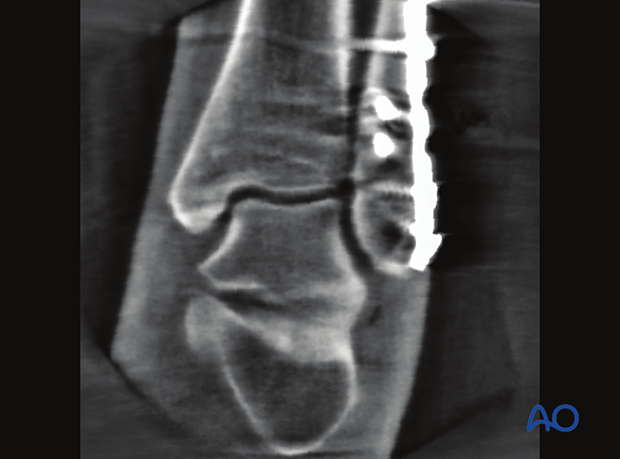
The following lines and landmarks can be observed:
- Fibular joint surface
- Talar joint surface
- Distal tibial joint surface
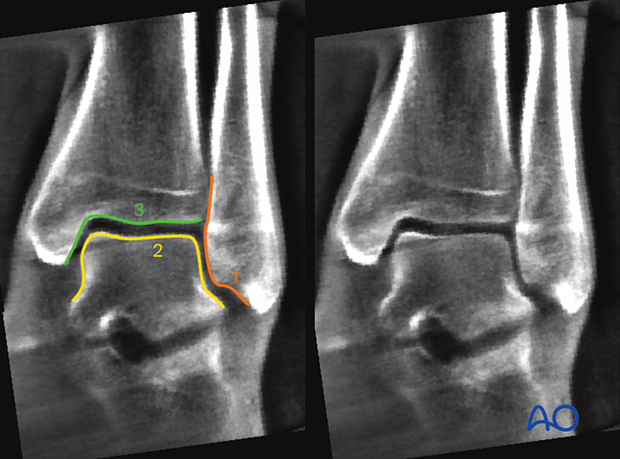
- Shenton's line
This view is particularly useful to identify:
- Asymmetrical joint space
- Shortening of the fibula compared to contralateral side
- Implant misplacement
- Visible gaps or steps in the joint surface
- Failure to address syndesmotic avulsions
- Tubercule de Chaput fragment
- Wagstaffe – Le Fort fragment
