ORIF - Compression plating
1. Principles
Compression plate
Compression plating provides fixation with absolute stability for two-part fracture patterns, where the bone fragments can be compressed. Compression plating is typically used for simple fracture patterns with low obliquity, where there is insufficient room for a lag screw. The alternative plate fixation technique, used when fragments cannot be compressed due to their multiplicity, is bridge plating.
Compression plating can only be applied by an open procedure.
The objective of compression plating is to produce absolute stability, eliminating all interfragmentary motion.
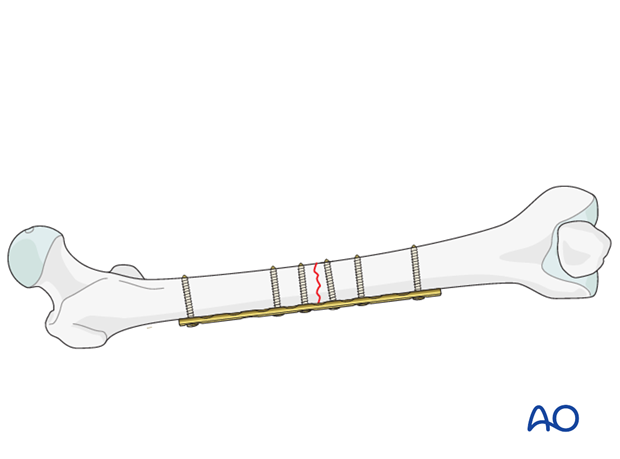
Dynamic compression principle
Compression of the fracture is usually produced by eccentric screw placement at one or more of the dynamic compression plate holes.
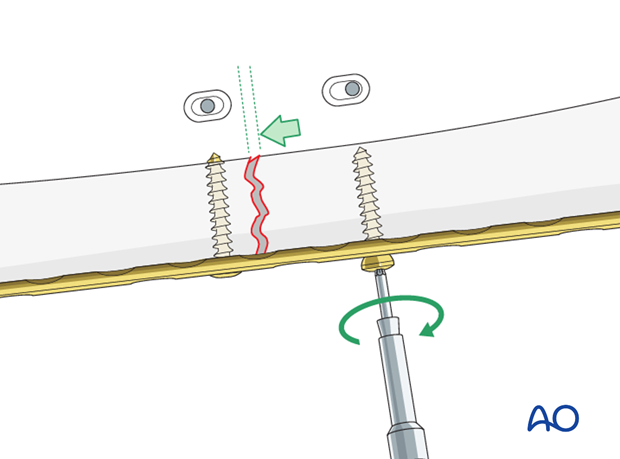
The screw head slides down the inclined plate hole as it is tightened, with the head forcing the plate to move along the bone, thereby compressing the fracture.
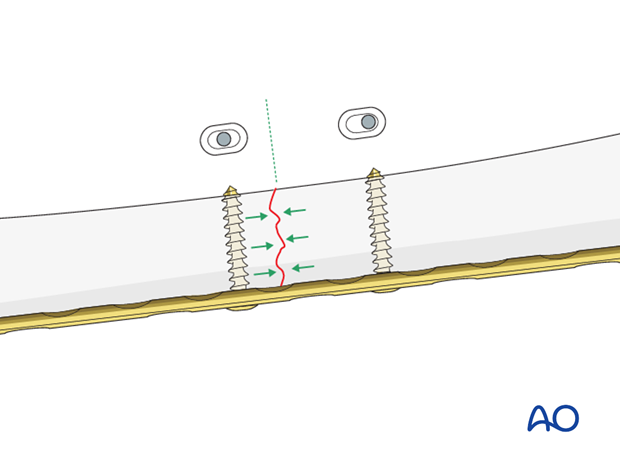
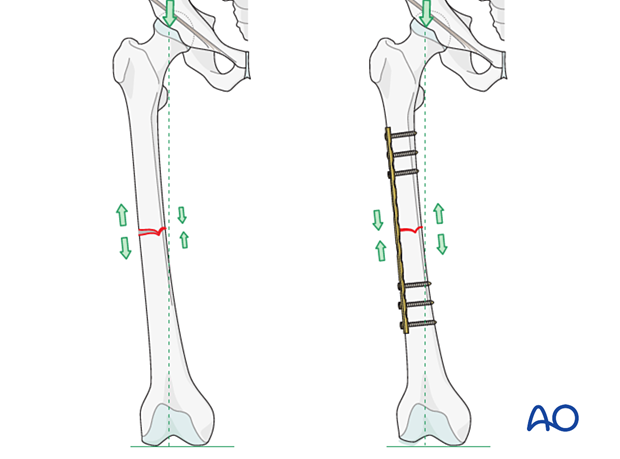
Plate position on the femur/tension band principle
As a general rule the plate should be positioned on the lateral aspect of the femur.
A properly contoured plate acts as a dynamic tension band when applied to the tension side of the bone and when stable cortical contact is present on the opposite side to the plate.
With vertical load, the curved femur creates a tension force laterally and a compression force medially.
A plate positioned on the side of the tensile force resists it at the fracture site, provided there is stable cortical contact opposite to the plate.
Further information on the tension band principle can be found here.
2. Plate selection
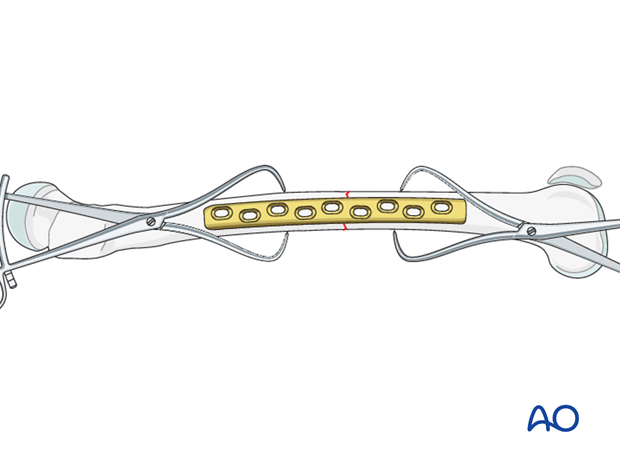
For transverse fractures of the femoral midshaft, at least three bicortical screws must be inserted into each fragment. Preferably, a nine-hole broad 4.5 mm plate is chosen. In this way, the second to the last screw hole at each plate end, as well as one plate hole over the fracture, can be left unoccupied.

3. Patient preparation
The patient may be placed in one of the following positions:
4. Approach
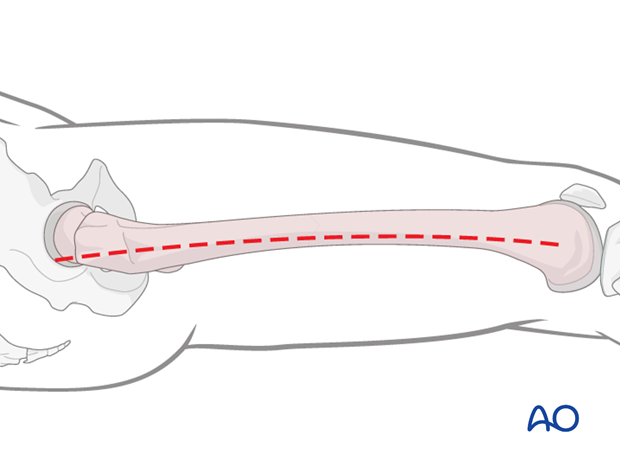
For this procedure a lateral approach is used.
5. Reduction
After extraperiosteal exposure of the lateral aspect of the femur, the direct reduction is carried out by using manual traction/traction table, and/or bone reduction forceps. With purely transverse fractures, it is rarely possible to achieve reduction by forceful longitudinal traction alone. It is usually necessary to increase the angulation (apex anteriorly) to reduce the posterior cortices, and then straighten the bone to reduce the whole fracture.
Anatomical fracture reduction can be observed directly.
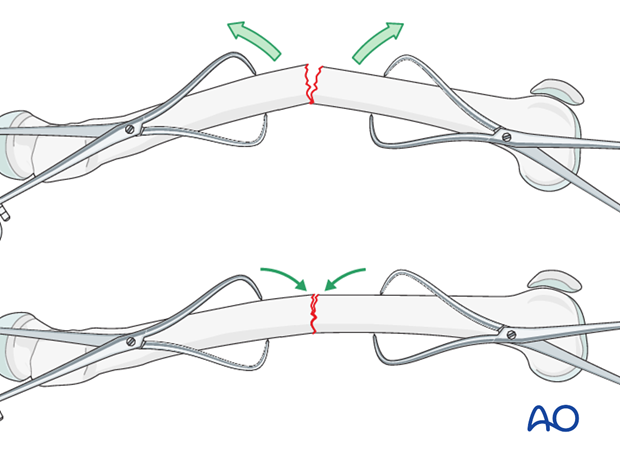
The plate will be positioned on the lateral aspect of the femur.
6. Contouring the plate
Fitting the plate to the bone
Depending on the planned plate location, some contouring of the plate may become necessary. This applies distally as well as proximally.
Contouring is aided by a stable provisional reduction and a malleable template that can be shaped along the bone surface. The malleated template is then used as a guide for shaping the plate to the bone.
Overbending the plate
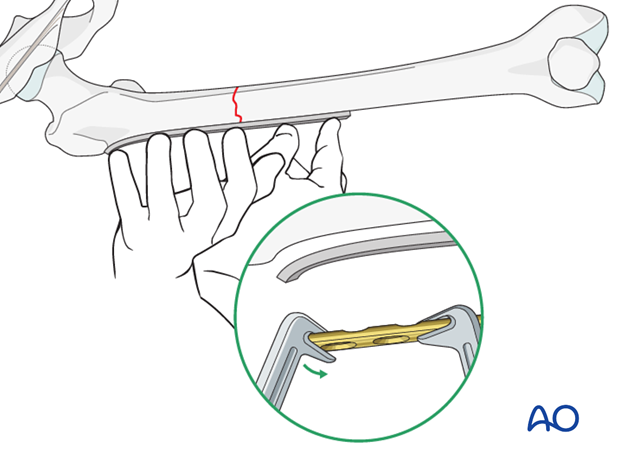
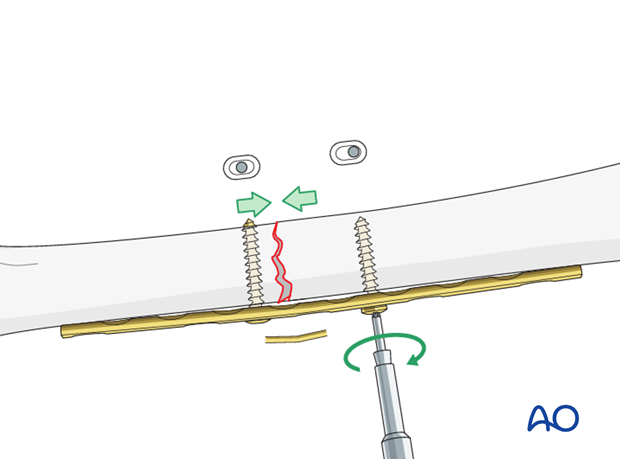
With short oblique, or transverse fractures, the plate should be slightly overbent (more convex), so that it fits imperfectly onto the bone. As the eccentrically placed screws are tightened in an overbent plate, the far (trans) cortex is compressed first. With further tightening, the near (cis) cortex also becomes compressed.
Such short, convex “overbends” are realized with handheld bending pliers or bending irons. The overbent section of the plate should be placed directly over the fracture line.
Pitfall: fracture opening at trans cortex
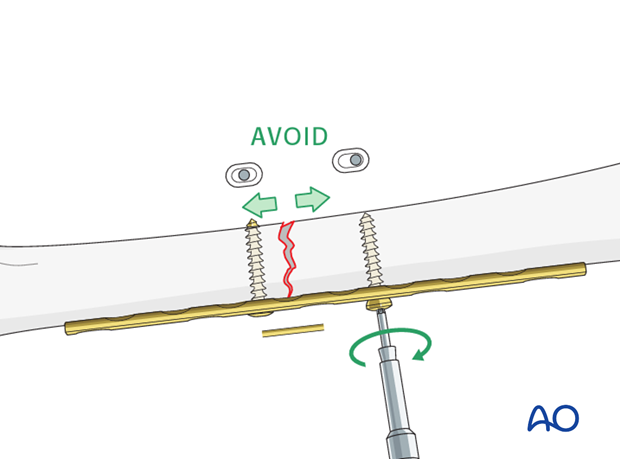
If a transverse or short oblique fracture is compressed with a plate that has not been overbent, the plate compresses the bone under the plate and causes gaping on the side opposite to the plate (trans cortex). This gap, and its resultant micromotion, can be prevented by first overbending the plate to achieve compression of the opposite side (as previously described).
In single plane fractures, such as this example, any micromotion results in excessive strain on the healing tissues at the fracture site and also increases the risk of fatigue failure of the plates if the union is delayed.
7. Plate fixation
Application of the plate
Periosteal stripping for plate fixation must be avoided.
The plate is positioned over the fracture so that at least four holes are available in each proximal and distal fragment.

Drilling for the first screw
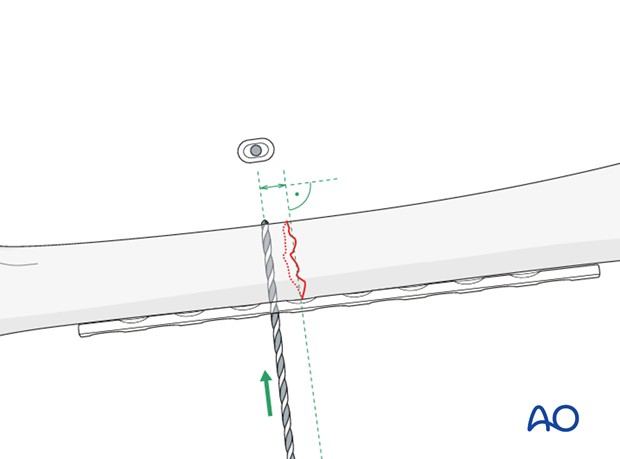
The first screw hole is drilled close to the fracture site. Its depth is measured through the plate, and tapping is required if non self-tapping screws are used.
Fixation of the plate with a first screw
The plate should be attached with one screw to the predrilled fragment. The screw should not be tightened completely. The surgeon should check that the plate fits properly and that the alignment as well as the fracture reduction are adequate. Next proceed to drill the other fragment.
Insert a second screw eccentrically
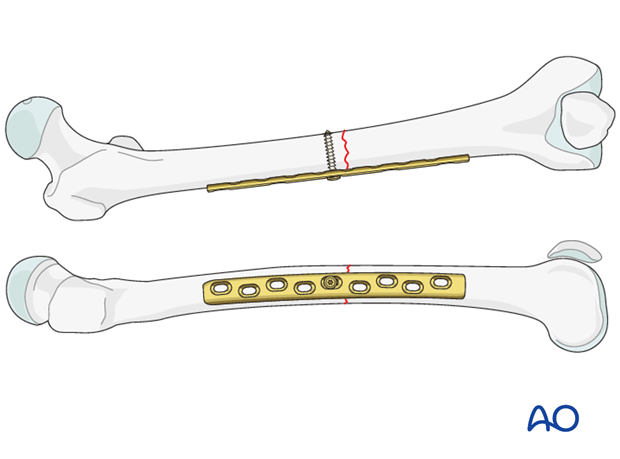
A second screw is inserted eccentrically into the other fragment, near the fracture.
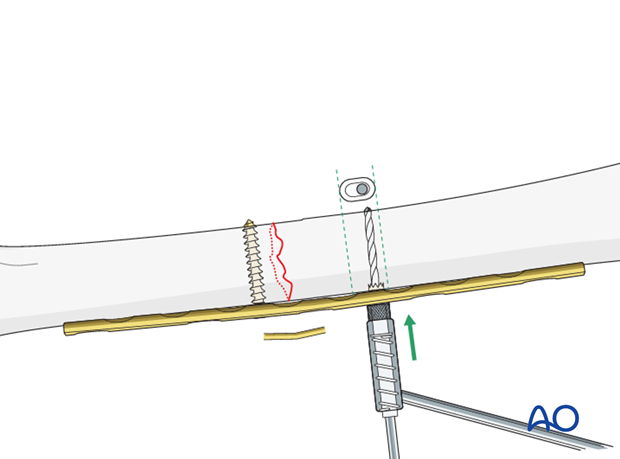
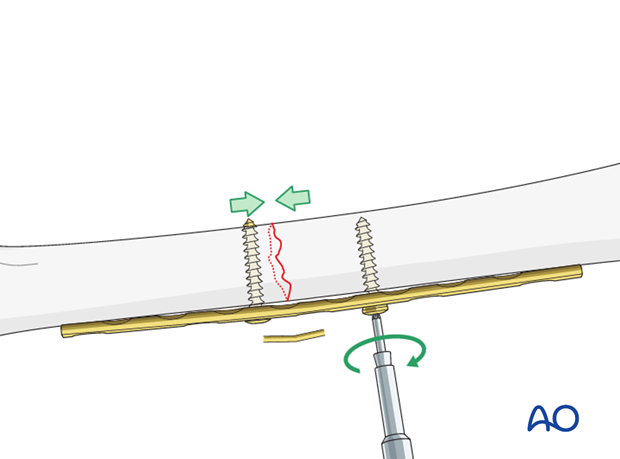
Tighten screws to compress fracture
As shown in this illustration, tightening the eccentrically placed screw compresses the fracture by pulling the proximal fragment towards the fracture.
It should be confirmed that the fracture surfaces are anatomically reduced, and that both ends of the plate fit satisfactorily.
Both screws should be tightened, and the reduction should be secured and compressed satisfactorily.
Finish screw insertion
The remaining screws are inserted.
If the femur has a strong cortex, three bi-cortical screws should be sufficient in each fracture fragment. In case of osteoporotic bone, it may be safer to fill more screw holes.

8. Aftercare
Compartment syndrome and nerve injury
Close monitoring of the femoral muscle compartments should be carried out especially during the first 48 hours, in order to rule out compartment syndrome.
Postoperative assessment
In all cases in which radiological control has not been used during the procedure, a check x-ray to determine the correct placement of the implant and fracture reduction should be taken within 24 hours.
Functional treatment
Unless there are other injuries or complications, mobilization may be started on postoperative day 1. Static quadriceps exercises with passive range of motion of the knee should be encouraged. If a continuous passive motion device is used, this must be discontinued at regular intervals for the essential static muscle exercises. Afterwards special emphasis should be placed on active knee and hip movement.
Weight bearing
Full weight bearing may be performed with crutches or a walker.
Follow-up
Wound healing should be assessed regularly within the first two weeks. Subsequently a 6 and 12 week clinical and radiological follow-up is usually made. A longer period may be required if the fracture healing is delayed.
Implant removal
Implant removal is not mandatory and should be discussed with the patient, if there are implant-related symptoms after consolidated fracture healing.


