Supine position
1. Introduction
All approaches may be performed with the patient supine. It may be the safest position for the polytraumatized patient.
An additional radiolucent arm table is recommended.
2. Preoperative preparation
Operating room personnel (ORP) need to know and confirm:
- Details of the patient (including a signed consent form and appropriate antibiotic and thromboprophylaxis)
- Patient positioning
- Comorbidities, including allergies
- Site and side of the fracture
- Ensure that the operative site has been marked by the surgeon
- Type of operation planned
- Implants to be used
- Condition of the soft tissues
3. Anesthesia
- General anesthesia
- Regional nerve block
- Combination of nerve block and light general anesthesia
4. Patient positioning
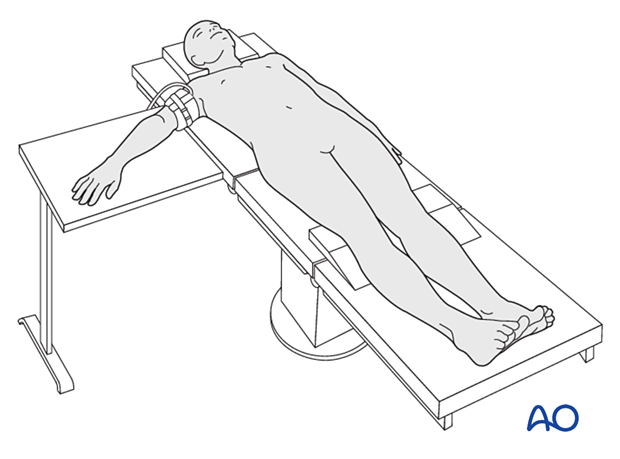
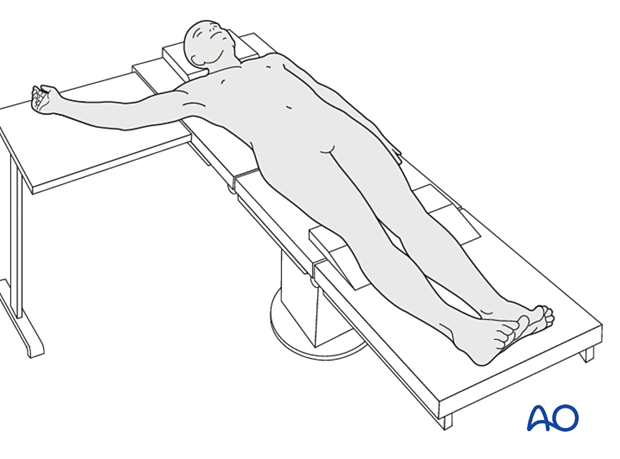
Place the patient supine with the shoulder abducted and the arm positioned on a radiolucent hand table.
Take care to avoid traction on the brachial plexus by not over abducting or extending the arm at the shoulder. To prevent this, the hand table must be at the same level as the operating table.
Use of a sterile tourniquet is determined by surgeon’s preference.
For convenient access by the anesthetist, the contralateral arm may also be placed on a side table.
Arm position for lateral approach
The elbow is flexed about 90° or as close as the armrest permits without the hand hanging over its edge.
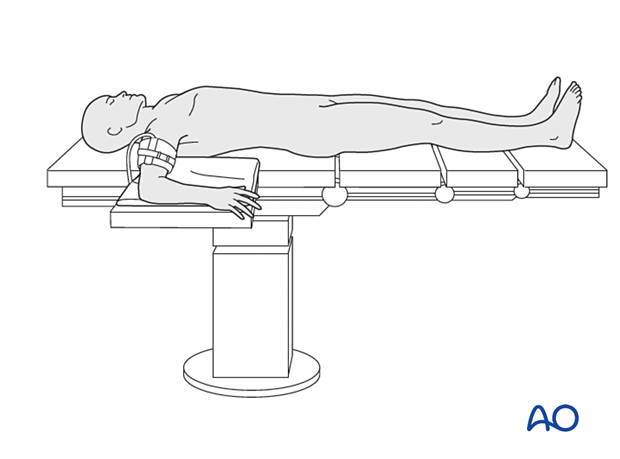
Alternatively, the arm can be positioned accross the chest. This allows for a posterior incision through which posterior and lateral approaches to the distal humerus and elbow can be performed after elevation of skin flaps.
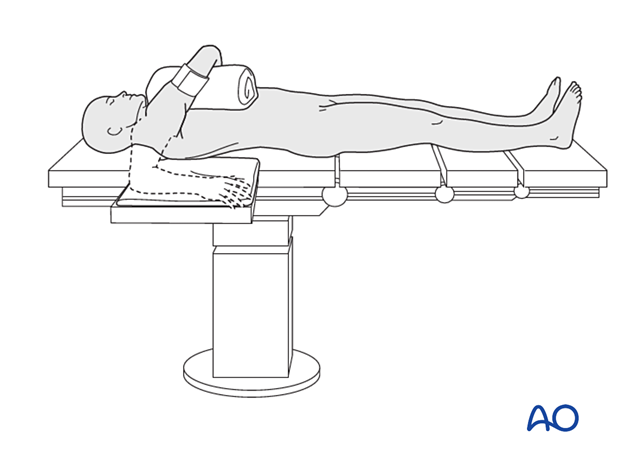
Arm position for medial approach
For a medial approach, rest the arm on the side table with the shoulder in abduction and external rotation and the elbow in extension or slight flexion.
5. C-arm positioning
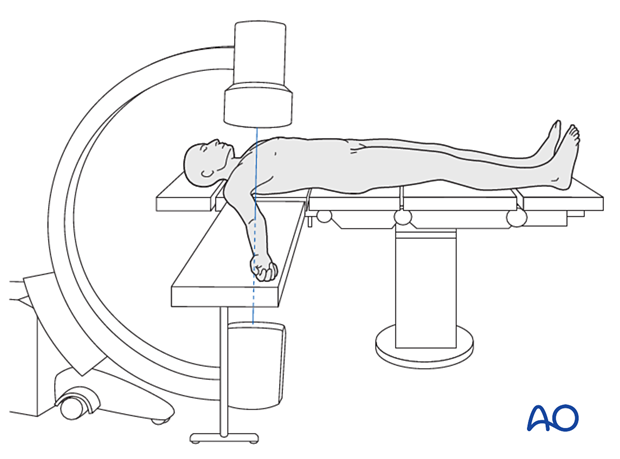
Introduce the image intensifier parallel to and from the head end of the OR table.
The entire humerus and elbow must be visible in two planes with the image intensifier.
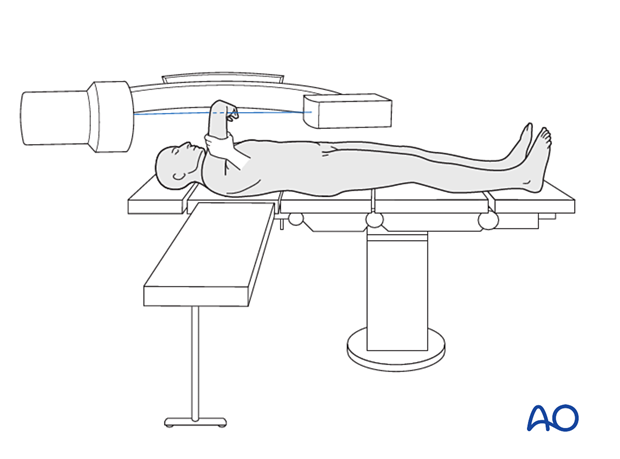
Alternatively, the C-arm can be brought in from the opposite side of the table in a horizontal orientation. Lateral views are obtained by lifting the elbow into the x-ray beam, and AP views are obtained by rotating the shoulder. This technique keeps the C-arm away from the surgeons and in a fixed position throughout the operation.
6. Skin disinfecting and draping
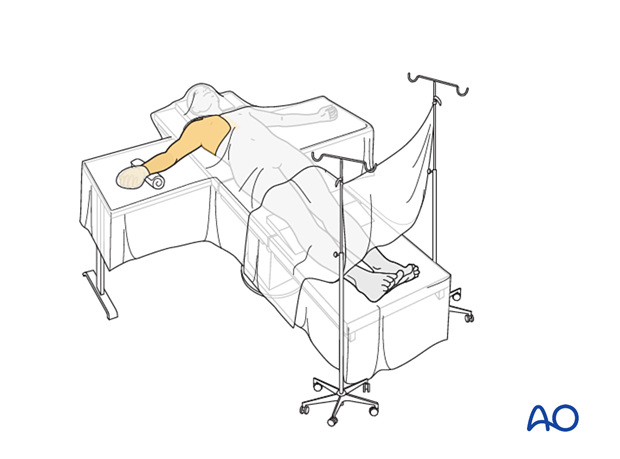
Disinfect the limb up to the shoulder.
Drape in such a way as to leave the upper arm and elbow joint exposed. The hand and forearm should be draped separately with a stockinette well fixed to the forearm.
Drape the image intensifier.
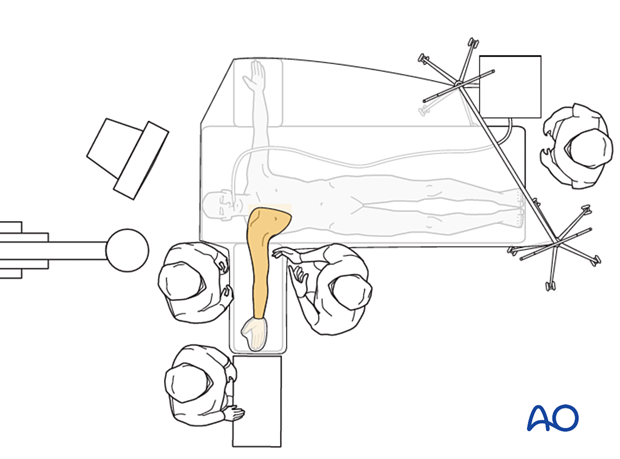
7. Operating room set-up
Depending on the operative exposure needed, the surgeon may sit or stand next to the patient’s trunk or lateral to the limb.
The assistant sits or stands on the opposite side of the side table.
The ORP is positioned next to the assistant.
Make sure the assistant and the scrub nurse do not impede the access of the image intensifier.
The anesthetic machine is positioned at the feet to provide a bigger sterile field for the surgical team to work around the elbow.
Place the image intensifier display screen in full view of the surgical team and the radiographer.
