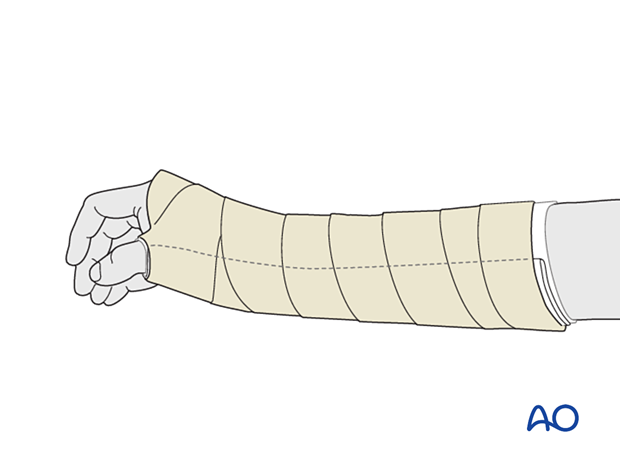
Percutaneous screw fixation with combined approaches
1. General considerations
Scaphoid waist fractures may be fixed with a headless compression screw (2.4 or 3.0 mm). The combined approach procedure consists of a dorsal percutaneous guide-wire insertion and a palmar percutaneous screw insertion. The guide wire can be inserted into the central axis of the bone. The palmar screw insertion bears the advantage of minimal soft-tissue damage.
Percutaneous (minimally invasive) treatment brings the advantages of internal fixation without the disadvantages of a wide surgical approach, eg, preserving the palmar ligament complex and local vascularity, and avoiding postoperative immobilization.
Anatomical considerations
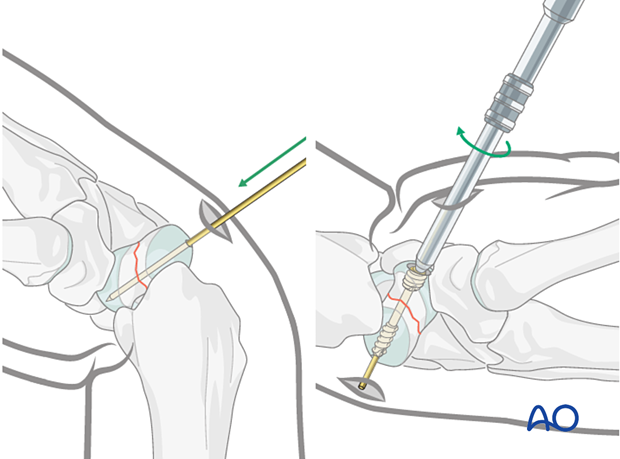
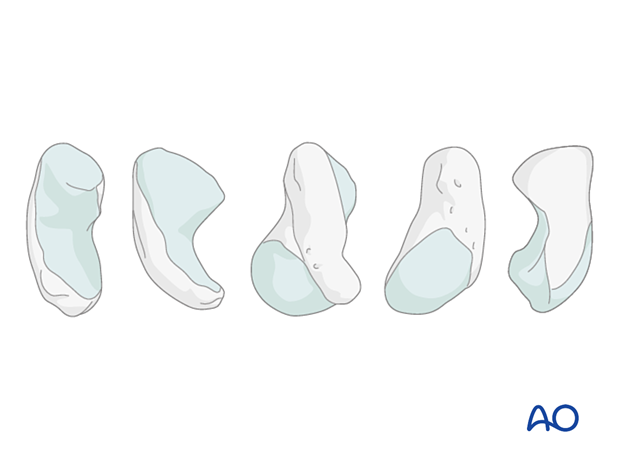
80% of the surface of the scaphoid is covered with articular cartilage. This greatly limits potential points of entry for fixation devices.
An additional constraint is the curved shape of the scaphoid.
This means that a wire or fixation device along the true central axis of the scaphoid is not possible from a palmar approach. Occasionally, access to a distal entry point for a device can only be gained by a limited excavation of the edge of the trapezium.
Preoperative planning
Conventional radiographs do not adequately demonstrate the complete fracture configuration. A CT scan is recommended if a percutaneous procedure is planned.
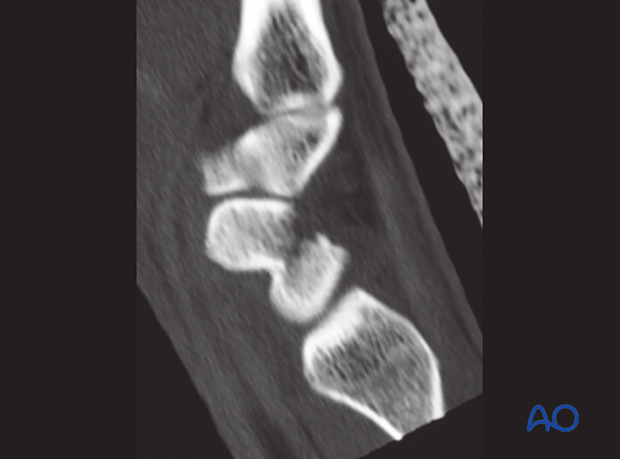
Before starting the surgical procedure, reexamine the fracture pattern under the image intensifier. Be sure that the fracture is suitable for a percutaneous technique and that no secondary displacement has occurred.
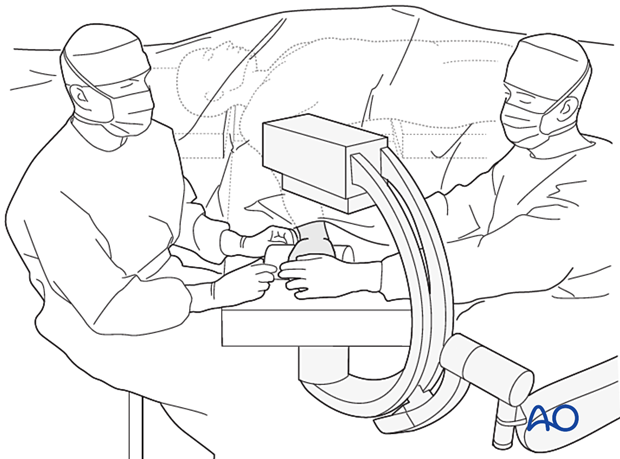
2. Patient preparation
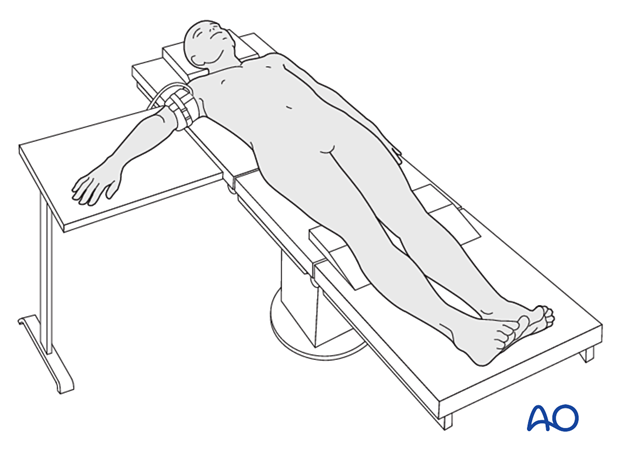
The patient is usually supine with the arm on a radiolucent side table.
3. Guide-wire insertion
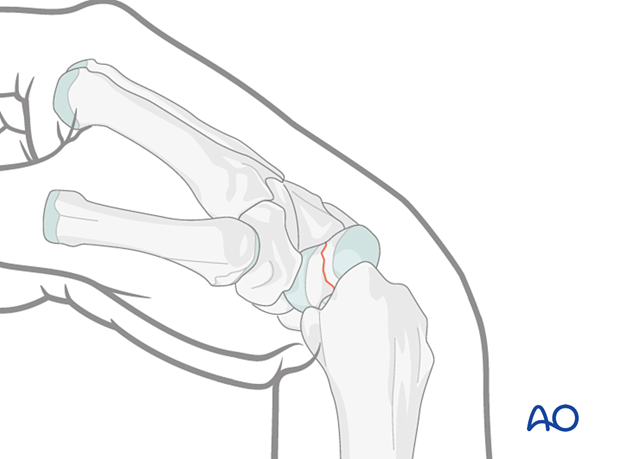
Palmar flexion of the wrist
For exposure of the proximal scaphoid, flex the wrist palmarly.
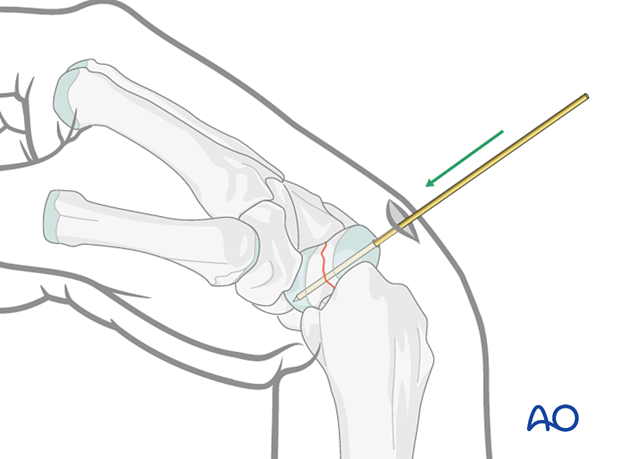
Insertion of the guide wire
Insert the guide wire percutaneously through the axis of the scaphoid across the fracture until it reaches the distal cortex.
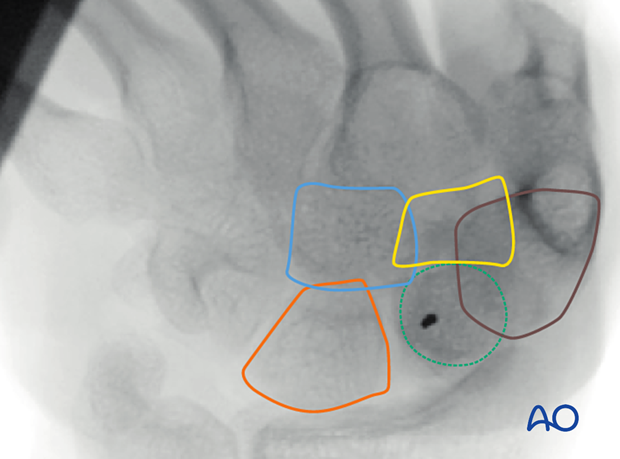
Check the position of the wire and fracture reduction with image intensification in AP and lateral views.
On the AP view with the wrist in palmar flexion, the scaphoid should appear as a ring pattern (green dotted line) as the proximal and distal poles are superimposed.
Lines indicate:
- Lunate (orange)
- Capitate (blue)
- Trapezoidal (yellow)
- Trapezoid (brown)
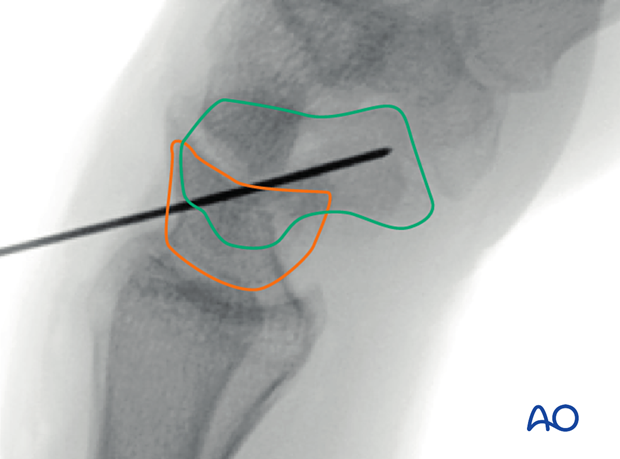
Lateral view of the above case (with the wrist in palmar flexion)
Lines indicate:
- Scaphoid (green)
- Lunate (orange)
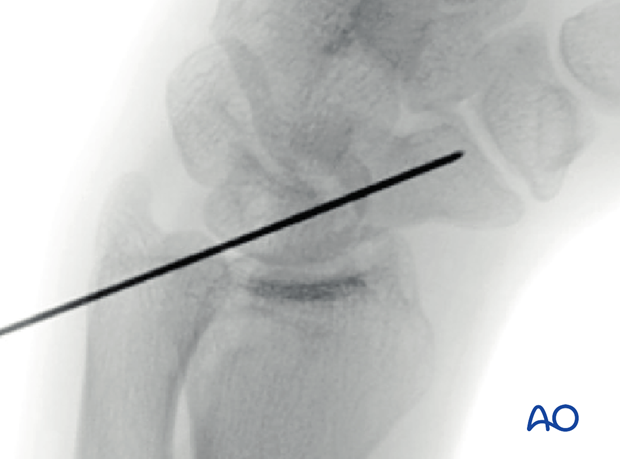
The oblique view (with the wrist in palmar flexion) of this case confirms that the guide wire is close to the scaphoid axis.
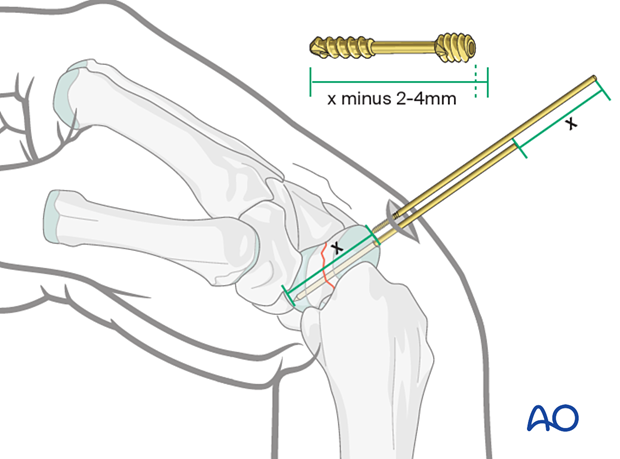
Determining the screw length
To determine the appropriate screw length, take another guide wire of the same length and place its tip onto the bone at the insertion point. The difference in length between the protruding ends of the two wires indicates the length of the drill hole for the screw.
Subtract at least 2–4 mm to determine the screw length with the appropriate thread length.
Advancing the guide wire
Advance the guide wire through the scaphoid and penetrate the palmar skin.
Create a small stab incision at the skin penetration site.
Advance the guide wire further for a sufficient distance to facilitate accurate guidance of retrograde screw insertion. The tip may be pulled palmarly with the power drill until the end of the K-wire is level with the dorsal skin incision.
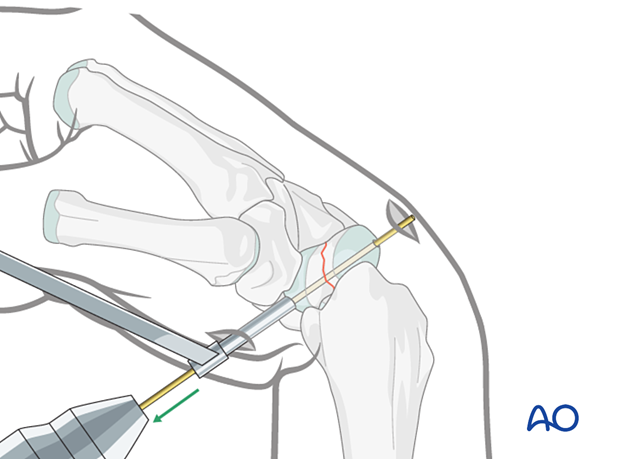
4. Screw insertion
Reposition the forearm from prone to supine.
Take care not to extend the wrist dorsally.
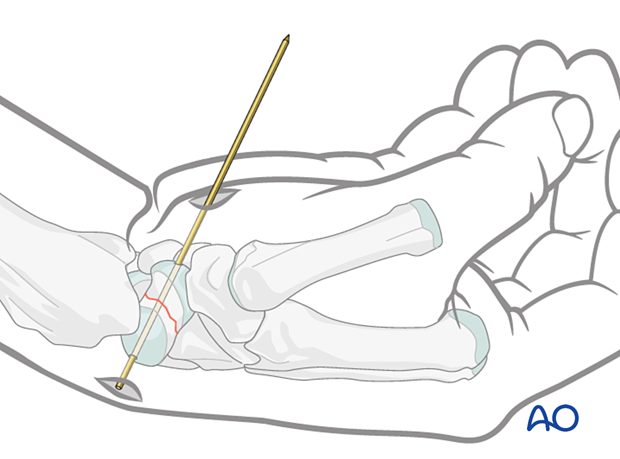
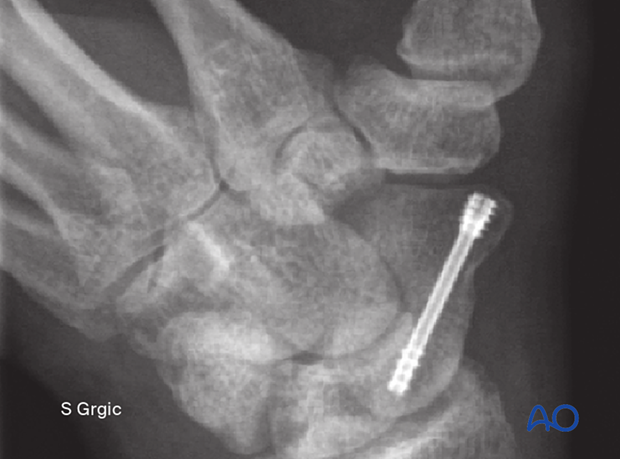
Insert the headless compression screw in a standard manner.
Sometimes, the trapezoidal lip may need to be trimmed to allow for screw insertion. This would require a formal palmar exposure of the scaphoid.
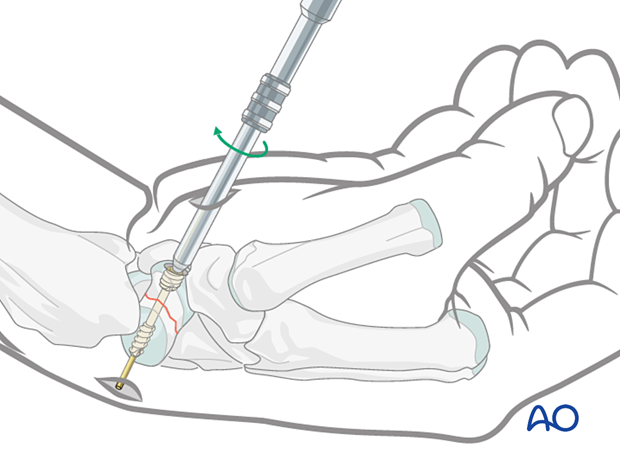
Check the final position of the screw and the scaphoid stability with an image intensifier.
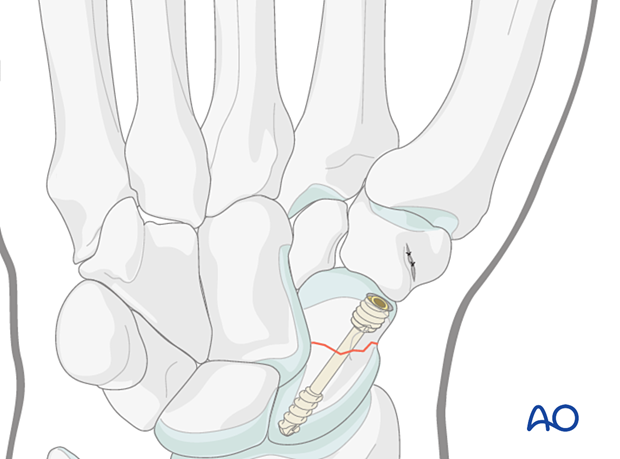
Case of screw fixation of a transverse scaphoid waist fracture
5. Aftercare
The aftercare can be divided into four phases of healing:
- Inflammatory phase (week 1–3)
- Early repair phase (week 4–6)
- Late repair and early tissue remodeling phase (week 7–12)
- Remodeling and reintegration phase (week 13 onwards)
Full details on each phase can be found here.
Pain control
To facilitate rehabilitation, it is important to control the postoperative pain adequately.
- Management of swelling
- Appropriate splintage
- Appropriate oral analgesia
- Careful consideration of peripheral nerve blockade
Immediate postoperative treatment
Immobilize the wrist with a well-padded below-elbow splint for 2 weeks.
Splinting helps with soft-tissue healing, especially of the ligaments cut during a palmar approach.
