ORIF through palmar approach - Retrograde screw fixation
1. General considerations
Introduction
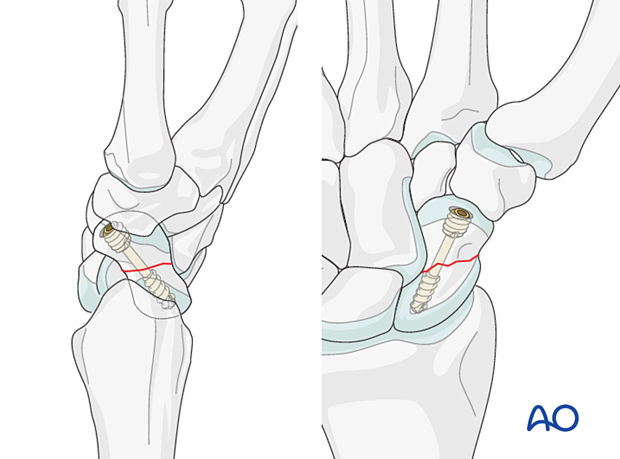
For the fixation of scaphoid waist fractures, headless compression screws (2.4 or 3.0 mm) may be used in a retrograde fashion through a palmar approach.
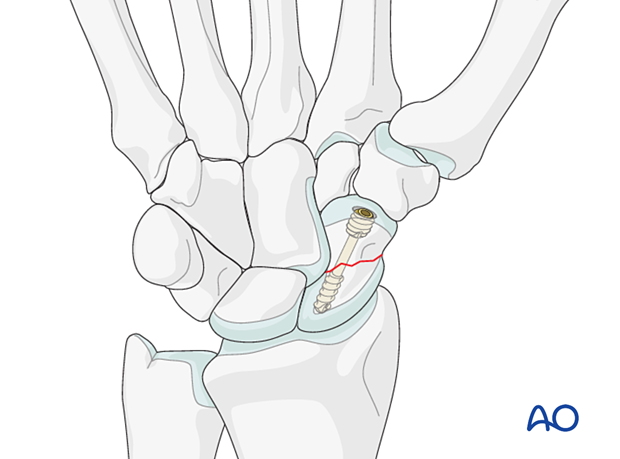
An oblique fracture in the coronal plane most often requires ORIF with either palmar or dorsal screw insertion.
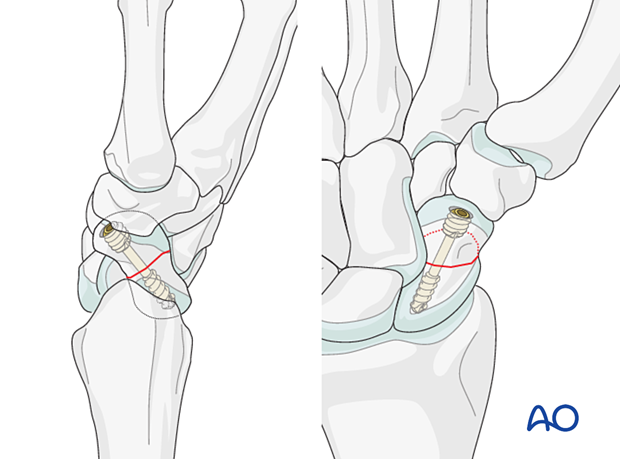
Antegrade vs retrograde screw insertion
The anatomy of the carpus limits the positioning of fixation devices along the true central axis of the scaphoid. In proximal pole fractures and most waist fractures, an antegrade screw insertion using a dorsal approach allows for a more accurate and reliable center-axis screw placement.
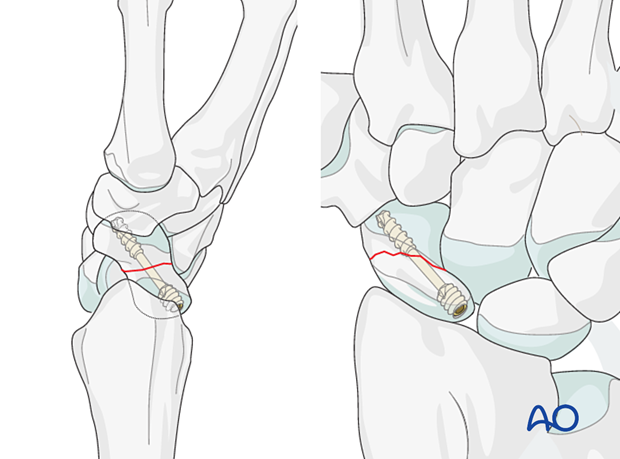
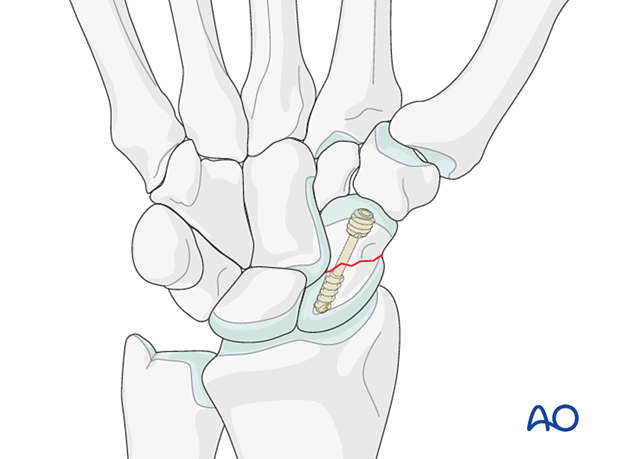
This illustration shows the screw placement with a palmar approach.
Note the eccentric position of the screw within the scaphoid in the lateral view.
Anatomical considerations
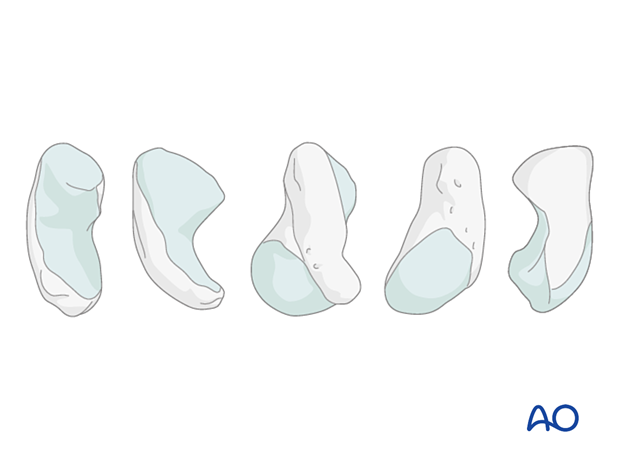
80% of the surface of the scaphoid is covered with articular cartilage. This greatly limits potential points of entry for fixation devices.
An additional constraint is the curved shape of the scaphoid.
This means that a wire or fixation device along the true central axis of the scaphoid is not possible from a palmar approach. Occasionally, access to a distal entry point for a device can only be gained by a limited excavation of the edge of the trapezium.
Fracture displacement forces
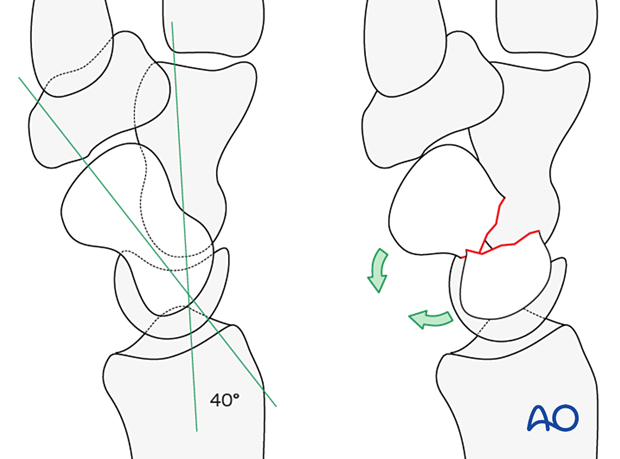
In displaced fractures of the waist of the scaphoid, the distal pole tends to rotate into flexion in relation to the proximal pole, the lunate, and the triquetrum, which lie in extension. This can create a rotational and angular deformity at the fracture site – the so-called “humpback deformity.”
Preoperative planning
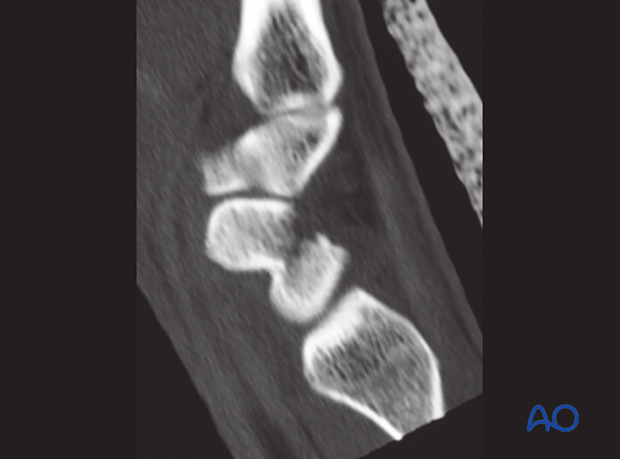
Conventional radiographs do not adequately demonstrate the complete fracture configuration. A CT scan is recommended to reveal the degree of displacement.
2. Patient preparation
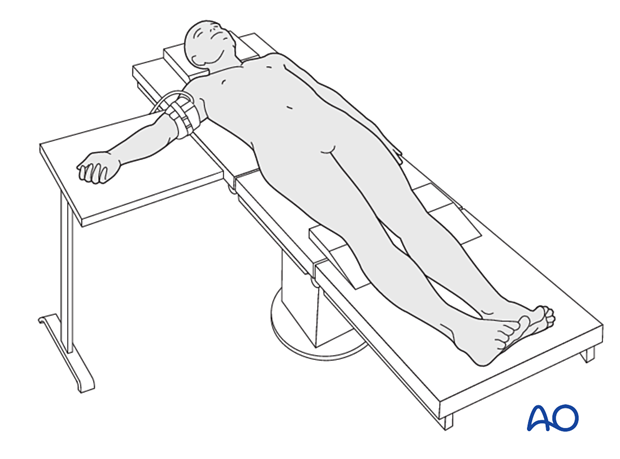
The patient is usually supine with the arm on a radiolucent side table.
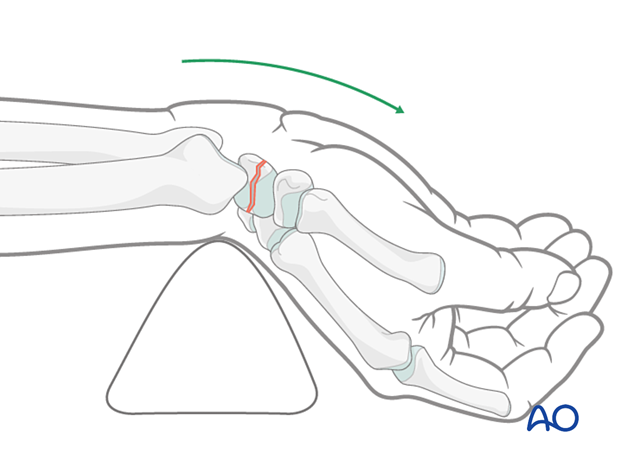
The wrist is extended with the help of a towel to allow for better exposure of the scaphoid.
3. Approach
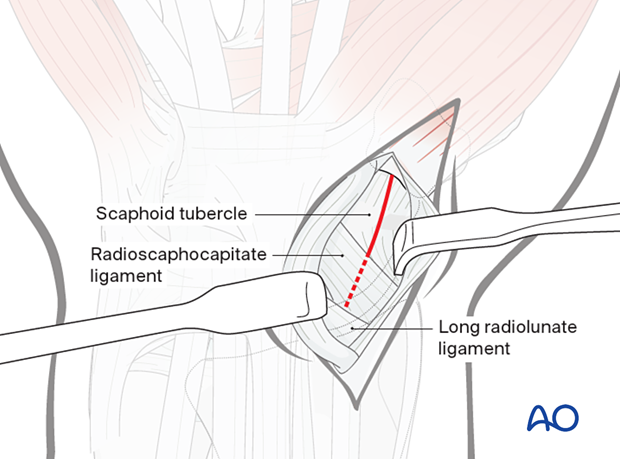
The palmar approach to the scaphoid gives access to displaced waist fractures that cannot be reduced and fixed by percutaneous techniques.
4. Reduction
Identifying the fracture
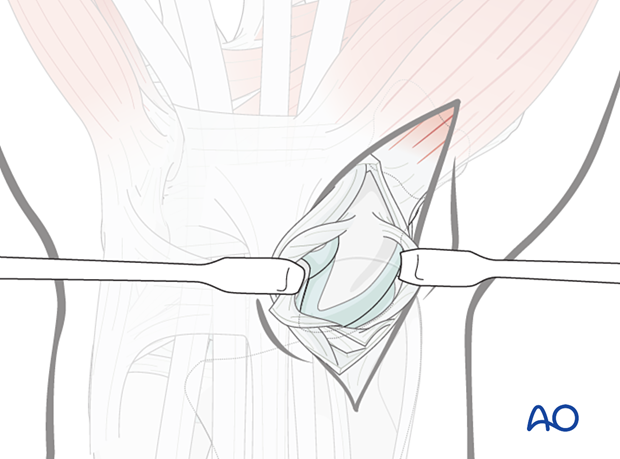
In delayed treatment, the fracture is not always obvious. Look for a wrinkle in the articular cartilage.
In these cases, distract, extend, and deviate the wrist towards the ulna to expose the fracture line. Remove any interposed soft tissues and loose bone fragments and irrigate the fracture site.
Reduction
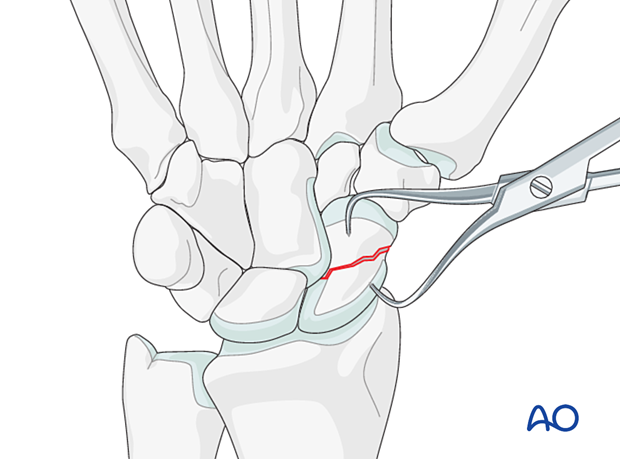
Use small pointed reduction forceps to reduce the fracture.
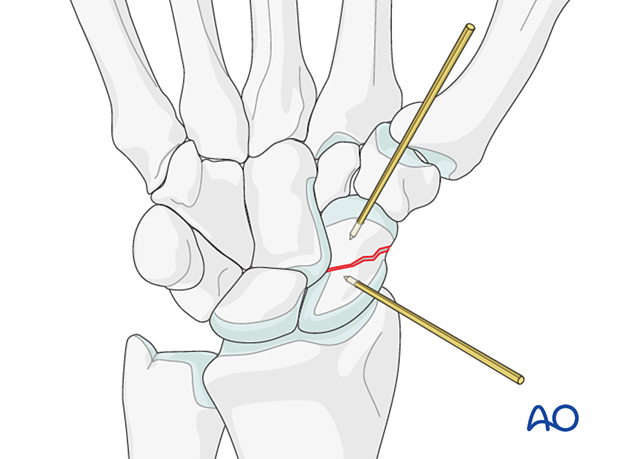
If the fracture cannot be reduced with the forceps, insert a K-wire into each fragment and use the wires as joysticks to manipulate the fragments.
After reduction, make sure that there is no rotational deformity with an image intensifier.
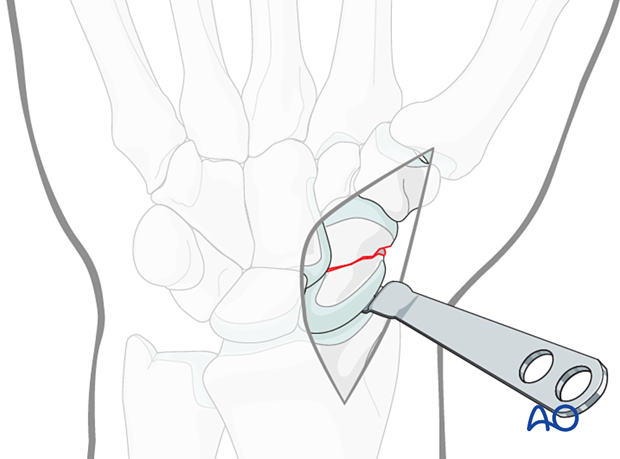
To gain a better view and support the reduction, gently expose the radial aspect of the scaphoid using a small elevator between the scaphoid and styloid process of the radius.
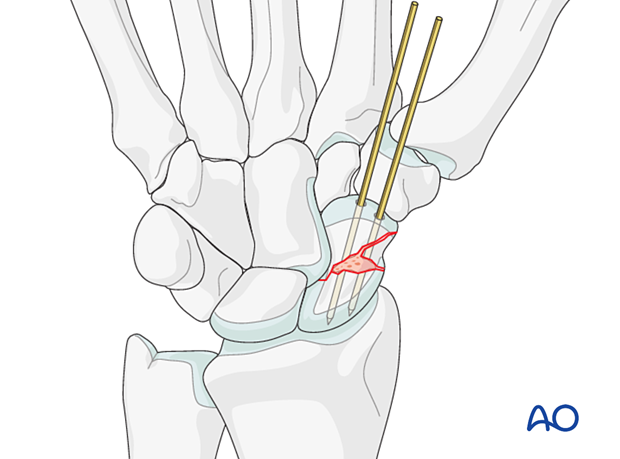
Fractures with a defect: adding bone graft
In the case of fracture comminution, particularly with compromise of the palmar cortex, or a defect after removal of loose fragments, autogenous, cancellous bone graft is necessary.
5. Guide-wire insertion
Planning for the optimal screw position
In principle, the screw should be as perpendicular as possible to the fracture plane.
In transverse fractures, the insertion point of the screw will be more radial on the distal pole of the scaphoid.
With more oblique fractures, the insertion point of the screw will be more ulnar on the distal pole of the scaphoid. A temporary K-wire may be removed before completing screw insertion.
Insertion of the guide wire
Insert a dedicated guide wire along the central axis of the scaphoid. Use the dedicated drill guide or a protective sleeve.
The guide wire track should be approximately angled 45° dorsally and 45° ulnarly along the mid-axis of the scaphoid.
Do not penetrate beyond the proximal cortex of the scaphoid.
The position of the wire should be as perpendicular as possible to the fracture line. In oblique fractures, this principle may have to be compromised.
Confirm position with an image intensifier before drilling.
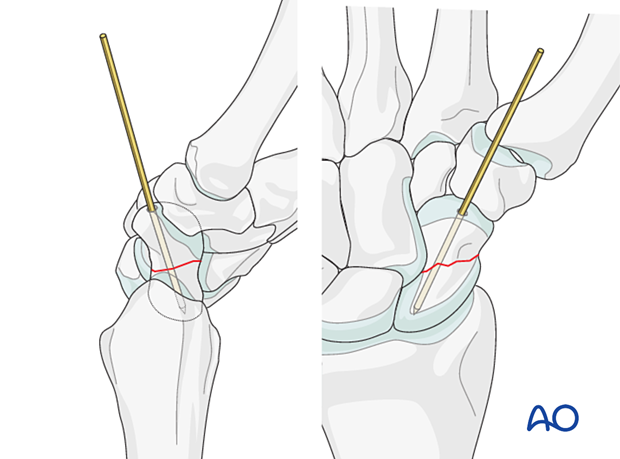
Occasionally, access to a distal entry point for a device can only be gained by a limited excavation of the edge of the trapezium or through it.
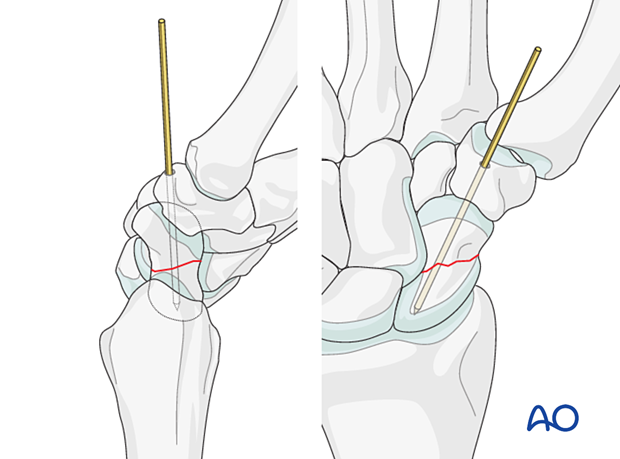
6. Screw insertion
Insert the headless compression screw in a standard manner.
Select a screw 2–4 mm shorter than the measured length with the appropriate thread length.
Check the final position of the screw and the scaphoid stability with an image intensifier.
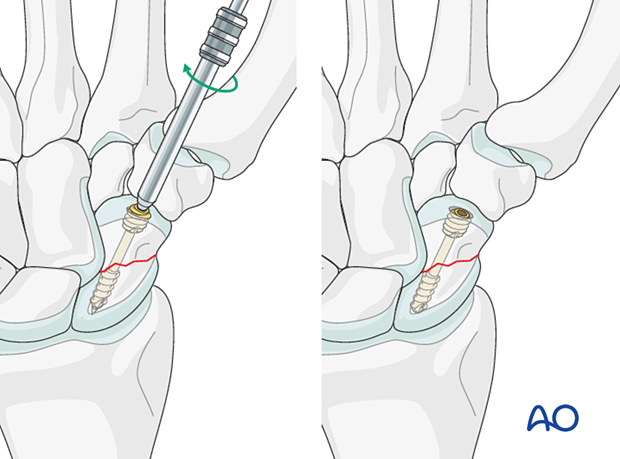
Screw insertion in fractures with bone graft or comminution
When inserting the screw, take care not to overcompress the area of bone graft or comminution.
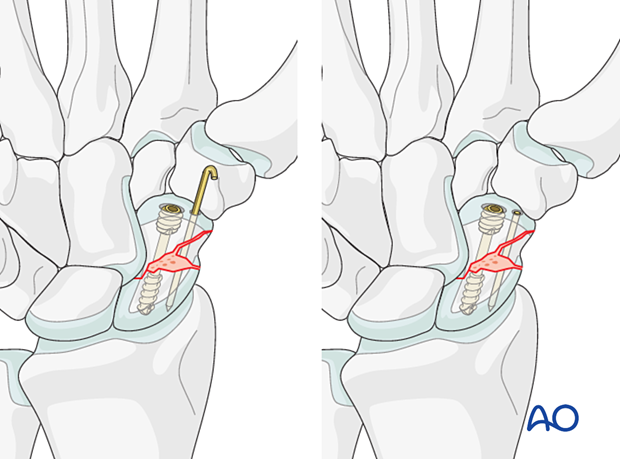
Leave the antirotational K-wire in place.
Cut the K-wire and bend it to bury it under the skin. This allows for removal at the moment of cast removal.
The K-wire may also be cut down to the bone for permanent insertion.
7. Aftercare
The aftercare can be divided into four phases of healing:
- Inflammatory phase (week 1–3)
- Early repair phase (week 4–6)
- Late repair and early tissue remodeling phase (week 7–12)
- Remodeling and reintegration phase (week 13 onwards)
Full details on each phase can be found here.
Pain control
To facilitate rehabilitation, it is important to control the postoperative pain adequately.
- Management of swelling
- Appropriate splintage
- Appropriate oral analgesia
- Careful consideration of peripheral nerve blockade
Immediate postoperative treatment
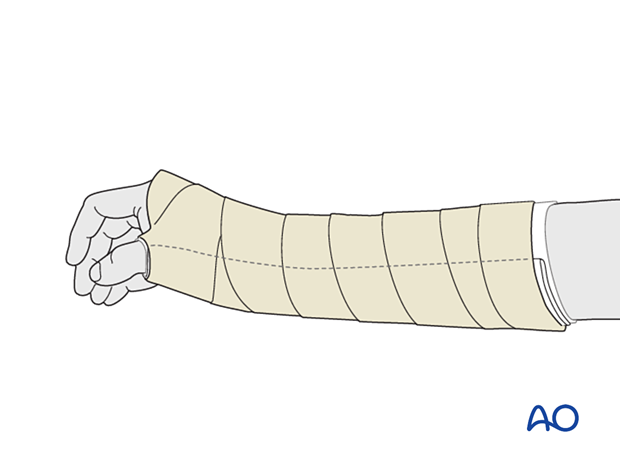
Immobilize the wrist with a well-padded below-elbow splint for 6 weeks as the radioscaphocapitate ligament may require a longer healing time.
Splinting helps with soft-tissue healing, especially of the ligaments cut during a palmar approach.
